


It has been nearly 10 years back in 2014 when the first edition of my book Force.com Enterprise Architecture was first published and clearly a lot has moved on since then and not just the platform capabilities. Keeping pace with branding changes resulted in the second edition of the book being called Lightning Platform Enterprise Architecture. This latest 4th edition, Salesforce Platform Enterprise Architecture has probably the most accurate and I hope enduring title! This 4th edition is also nearly twice the size of the first edition, coming in at 681 pages. So much so, its 16 chapters is now split over 4 parts to make digesting the book easier. As is tradition by now, this blog will cover some of latest updates and additions and what to expect in general from the book.
Links: Amazon | Packt Publishing
Motivation and what to expect…
I first came to the platform with a lot of experience and understanding of architecture principles from other platforms, including leveraging platform agnostic patterns such as those of Martin Fowler. Applying patterns to the platform requires some nuance at times, thus this book is about enterprise architecture considerations as applied to the Salesforce Platform and much more in respect to its capabilities that accelerate traditional application development concerns and tasks for you – and can hinder if not considered upfront in your architecture design.

The book dedicates 3 of its 16 chapters to Apex code separation of concerns, how to layout your code, while the rest covers the full spectrum of app concerns such as designing for code and database performance, profiling, testing, data storage design, building apis, extensibility and more and of course how to write much less code by harnessing the declarative aspects. All this is driven throughout the book via a fictitious reference application known as FormulaForce based on Formula1 motor racing – full source is included. Also included are numerous tips and tricks and info blocks pitted among the pages that highlight learnings from my own experiences, and latterly that of the many amazing reviewers.
As good as the platform is at abstracting a huge amount of the complexity of managing and securing modern day applications for you, there is no escaping having to fully understand good architecture principles that would, and do, in most cases apply elsewhere, such as query optimization and indexing.
If you are developing a lot on the Salesforce Platform, have a few years experience and are passionate about creating applications that are enduring and empathetic to the platform itself – this book is for you. Read on for further highlights!
Is it for ISVs or anyone?
This edition is the first to split out the motivations of packaging in respect to internal distribution needs within your own company vs distributing a commercial solution on AppExchange. Regardless of which motivation you fit into, the chapters will callout which bits are relevant vs not. Even if you are not into packaging at all right now, much of the content on Apex, Lightning, Flow, APIs etc is of course agnostic to how you choose to distribute your application. Regardless who you are sharing it with, the book gives you an appreciation of advantages and limits of packaged based distribution and in my view is a key aspect of your overall architecture considerations checklist.
Have the Apex coding patterns evolved given recent features?
The advent of user mode capabilities has had a big impact on the approach taken within the sample application of the book when it comes to using the Apex Enterprise Patterns Library (fflib), specifically in how the Unit of Work and Selector patterns are used when updating and querying for data respectively.

Additionally, the Domain pattern chapter now reflects on how Domain logic, can, if desired allow the developer to split Domain and Trigger logic into separate classes and thus introduces a new pattern (SDCL) to captured this approach. Thats not to say the original model has gone, it is still very much present, but it felt appropriate to include something in the book that reflects how the library usage has also evolved over the years – thanks to my good friend John M. Daniel for pushing for this!

Apply skills in other languages and additional scaling options
A brand new chapter in the book is dedicated to how Heroku and Functions can be used to leverage existing skills or indeed investments in open source or internally for code written in other languages such as Java or Node.js. These technologies also open up further scaling options. The chapter breaks down the approaches using the books sample application as a basis. Thus it continues the Formula1 motor racing theme by introducing Web and API interfaces for race fans and vendors (authentication scenario) to interact with the application backend APIs. Later in the book the integration chapter doubles down further on authoring APIs via OpenAPI standards and how that simplifies integration with the platform.

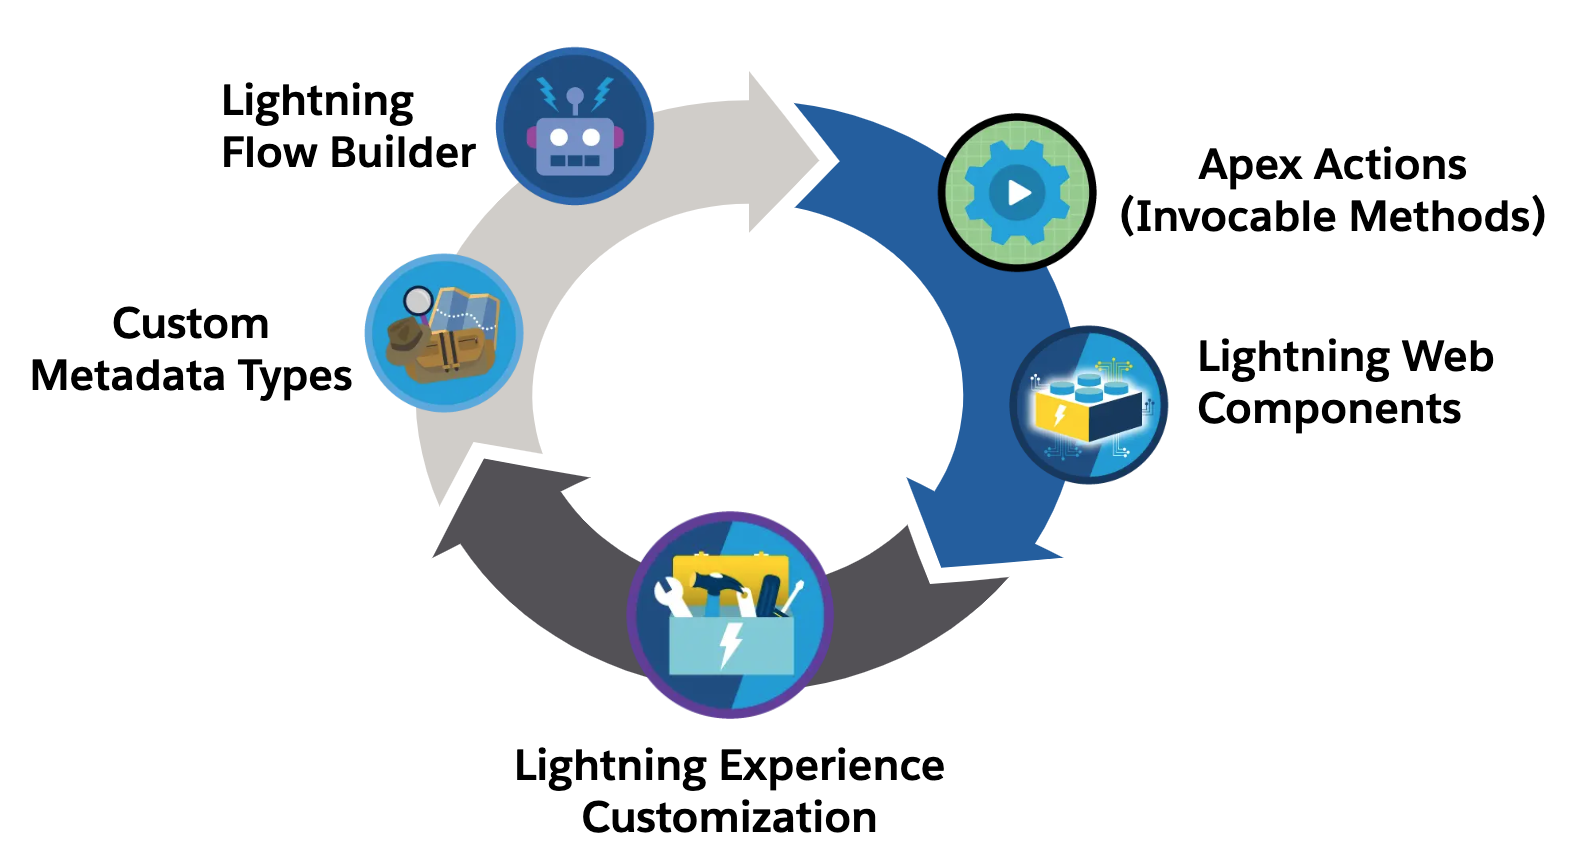
Lightning Web Components and Lightning Experience expansion
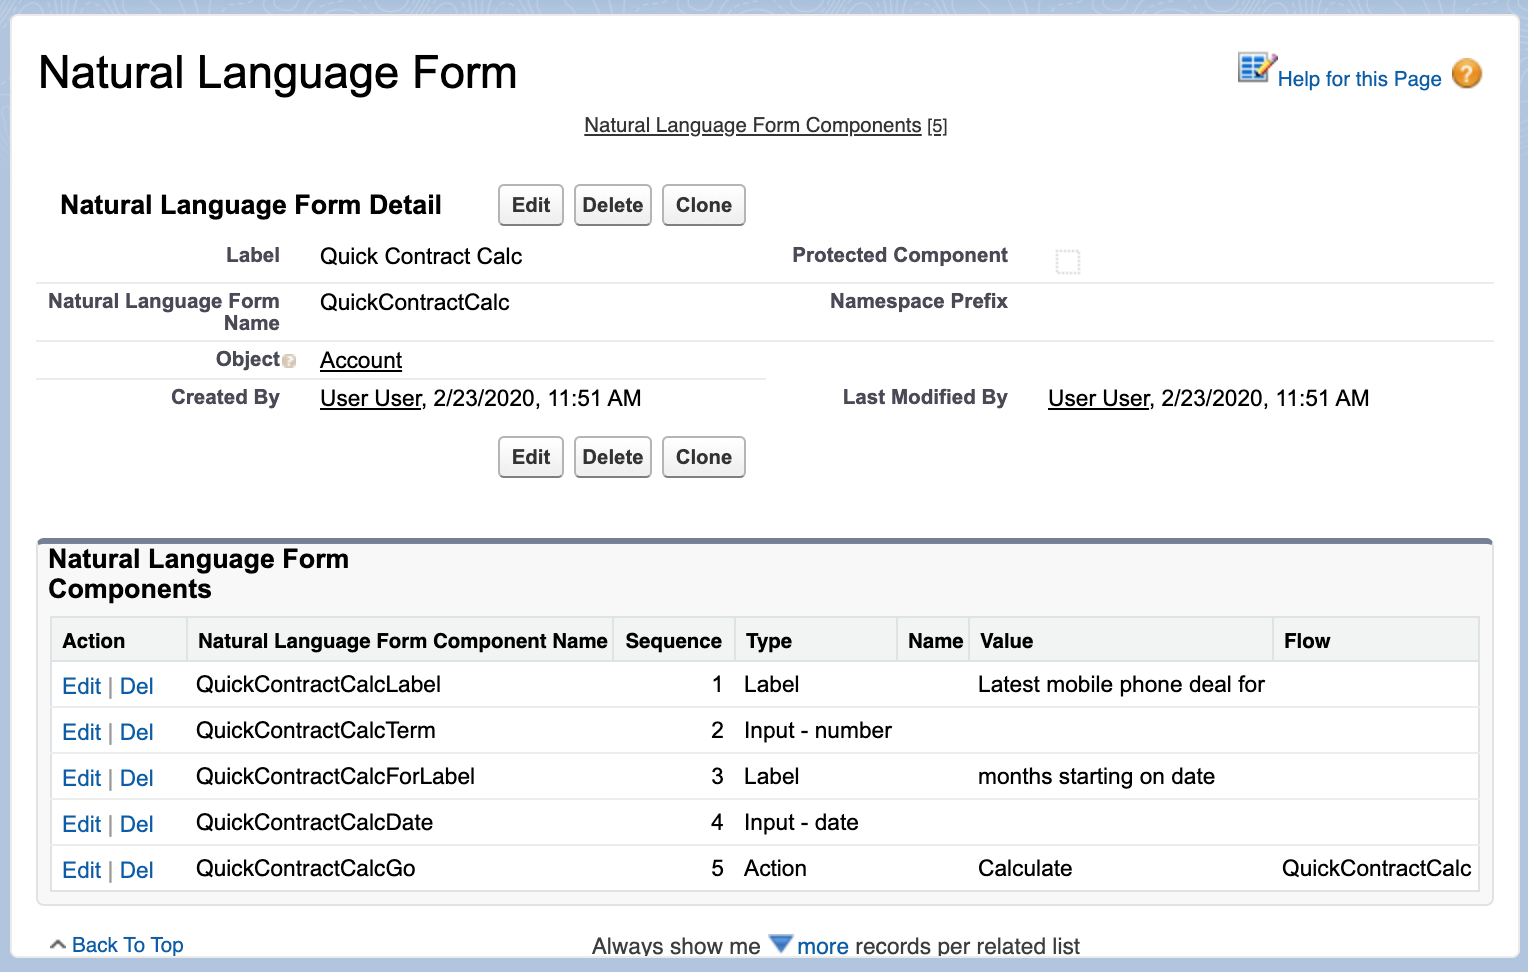
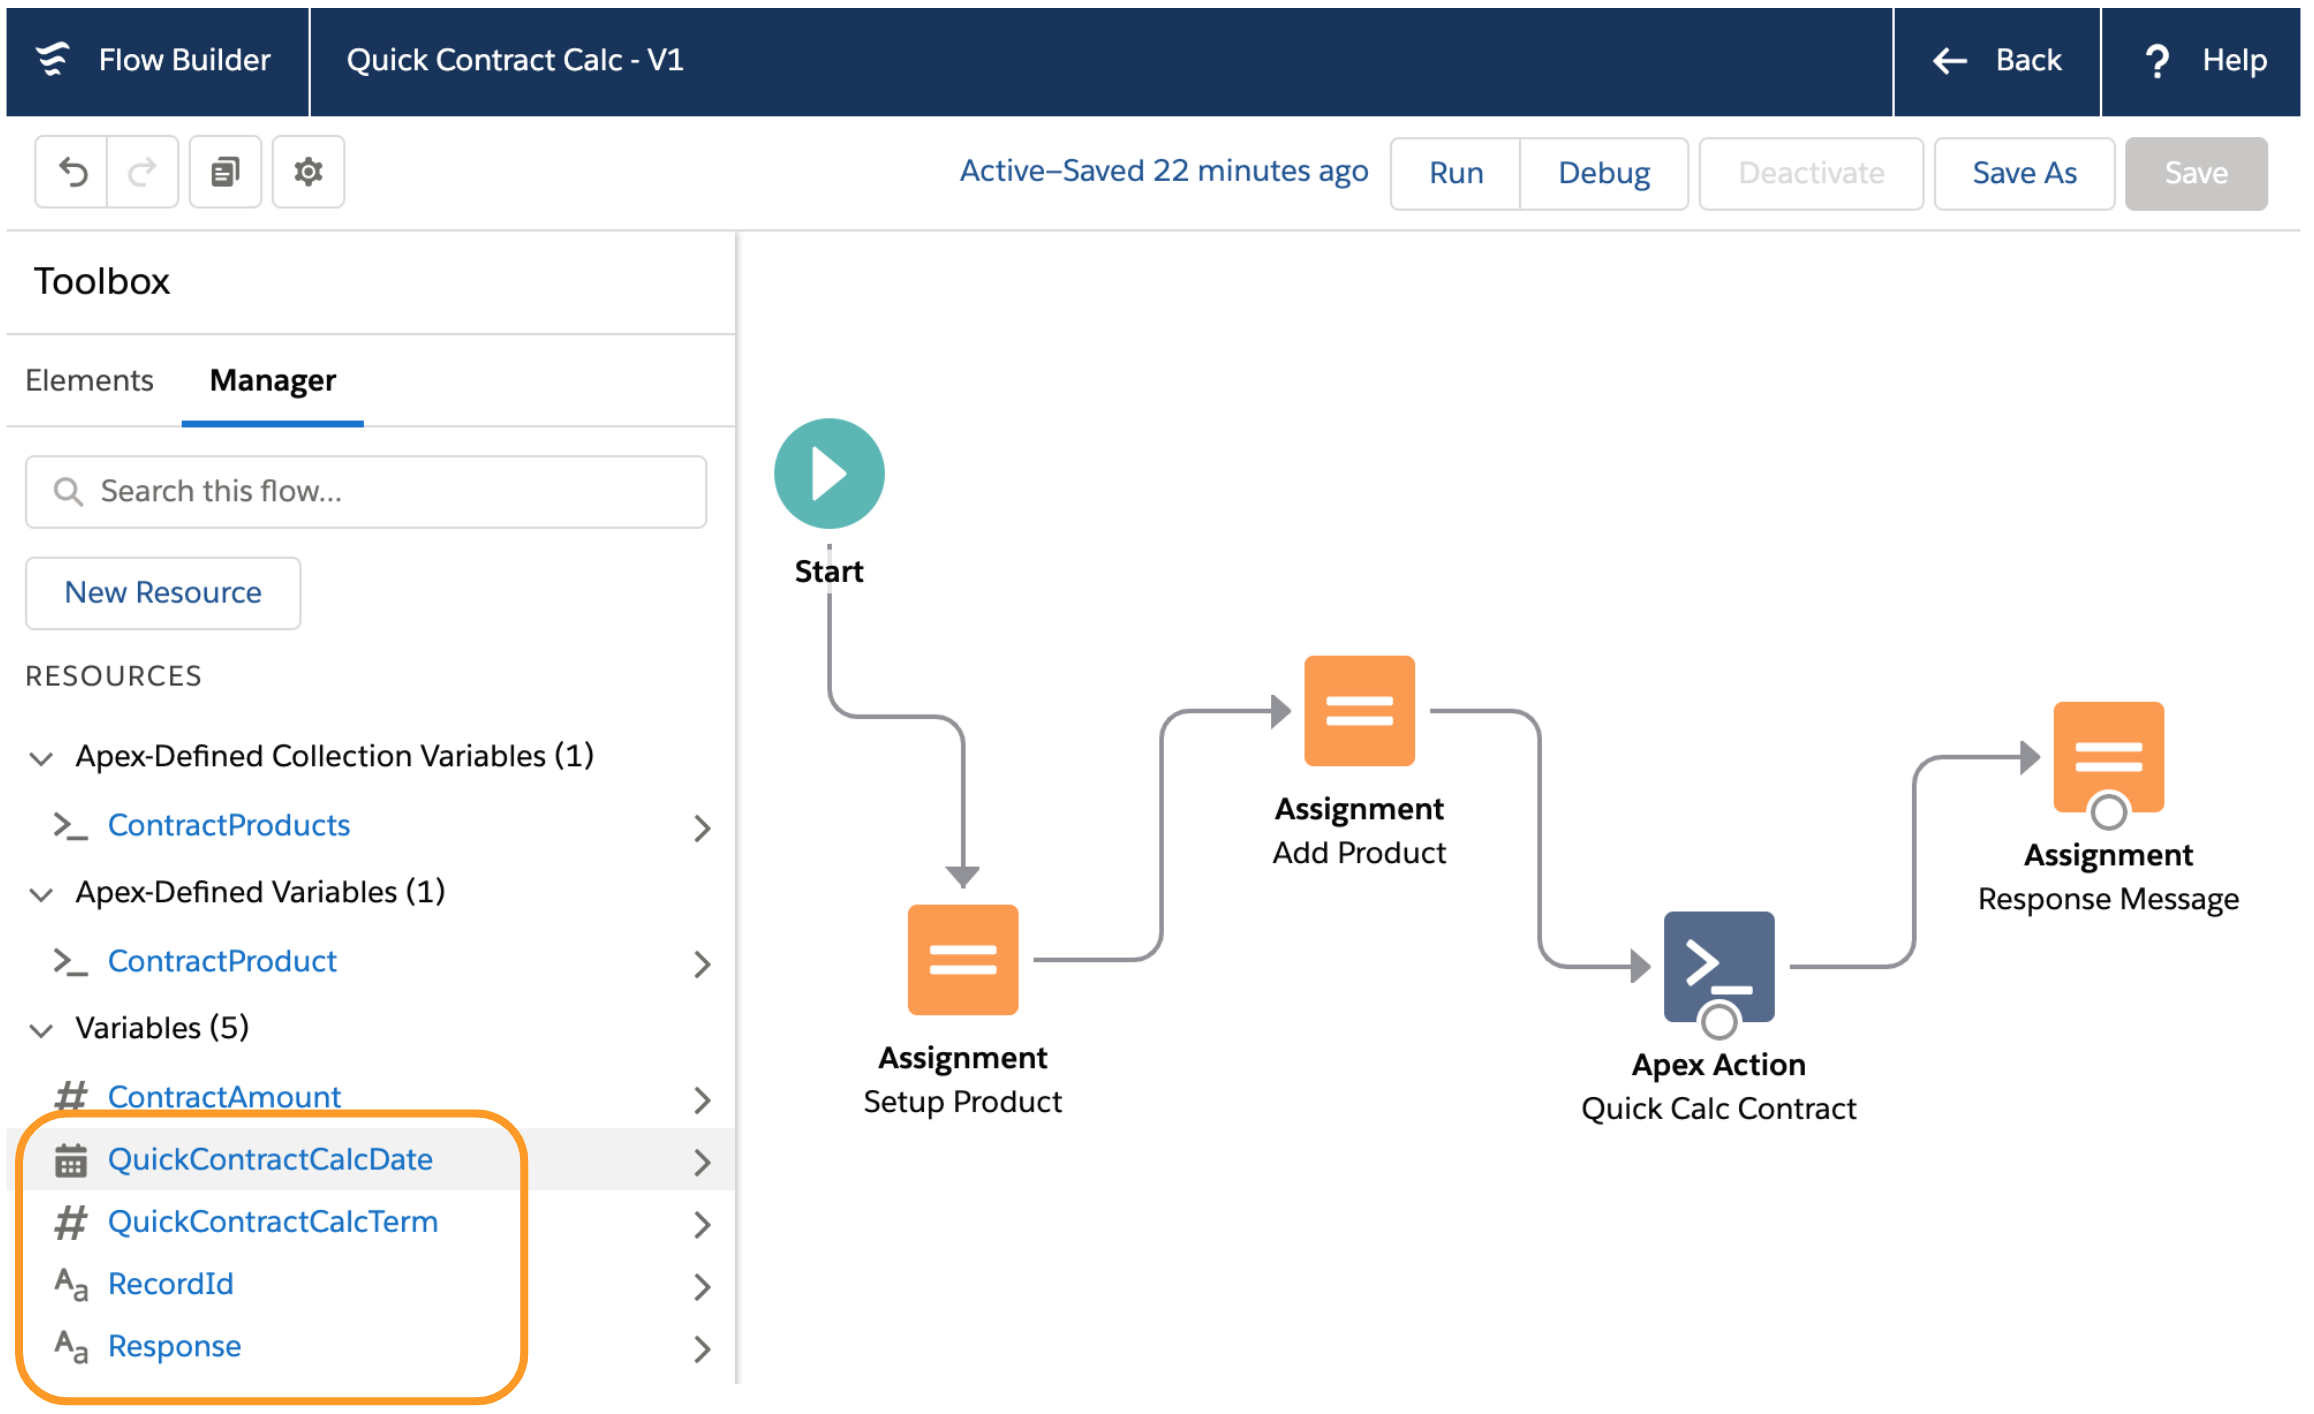
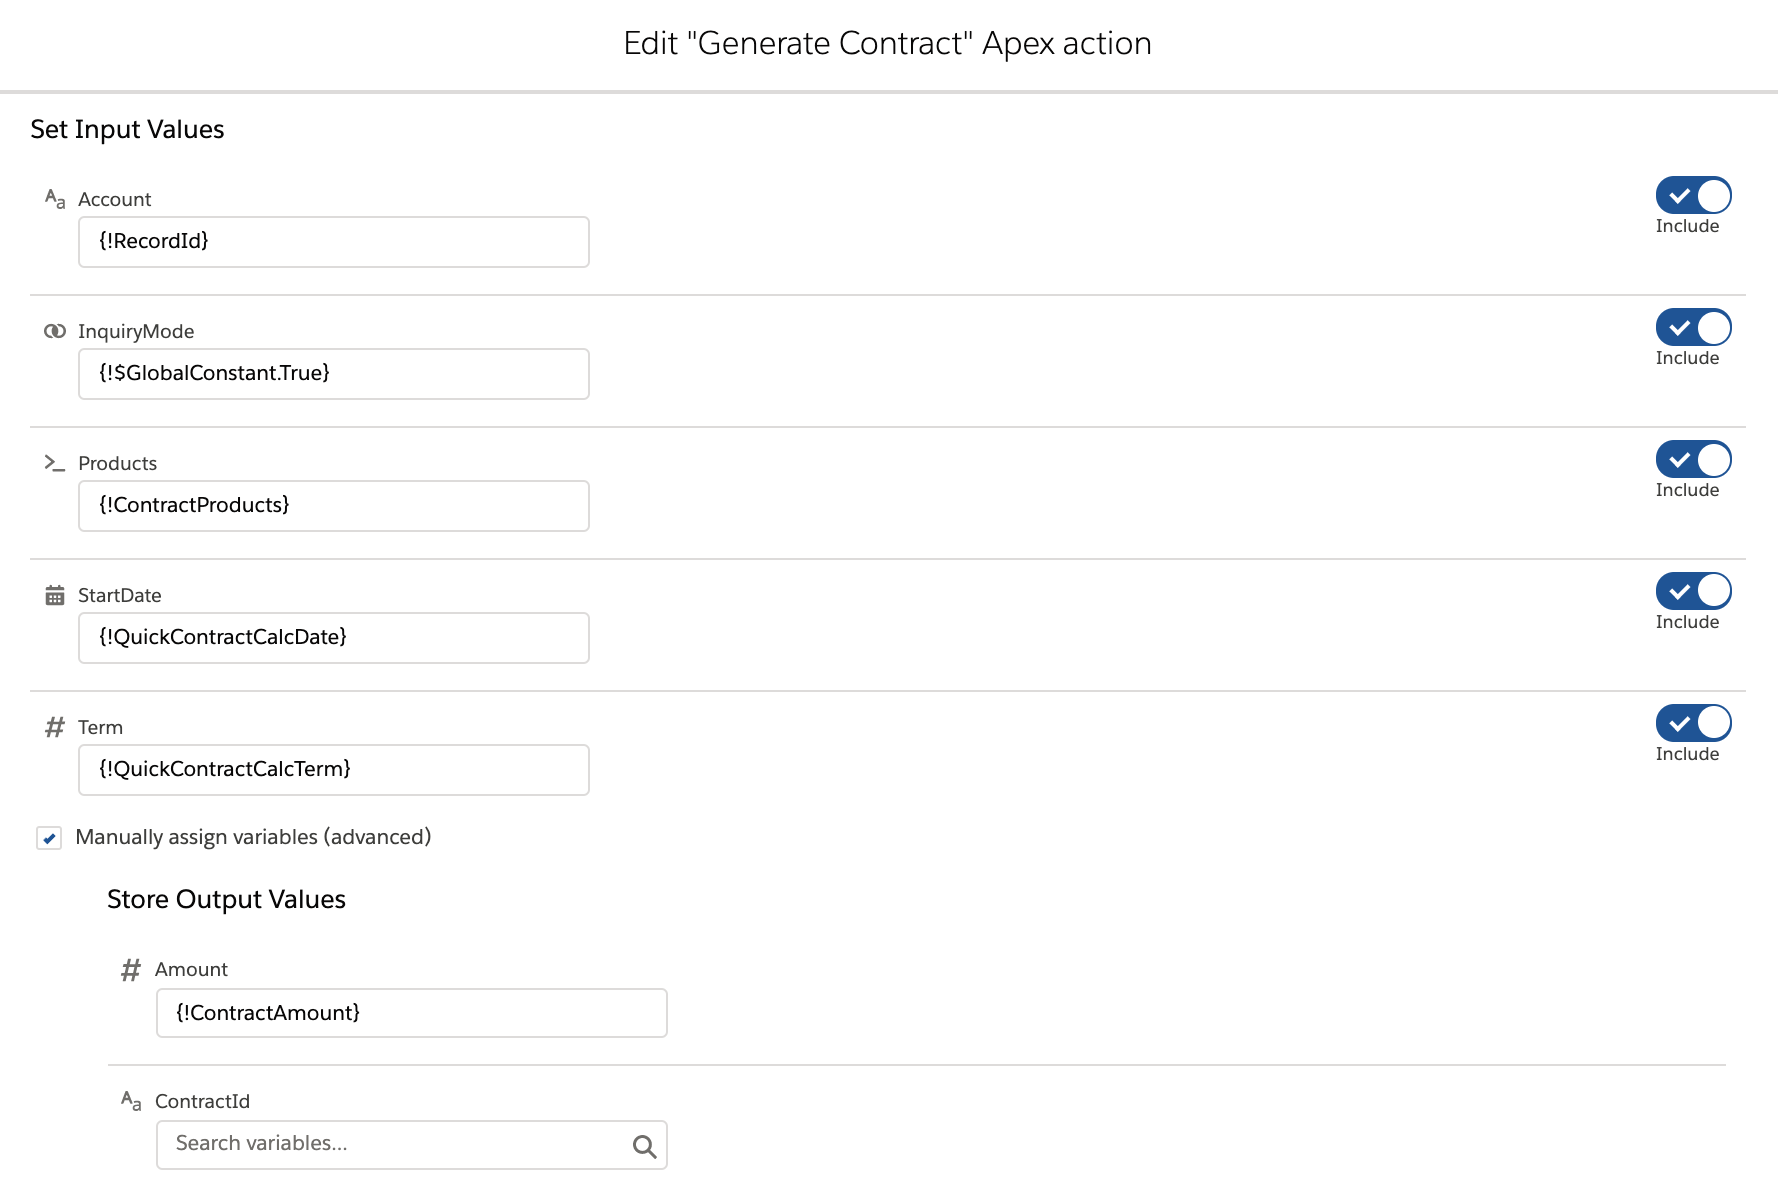
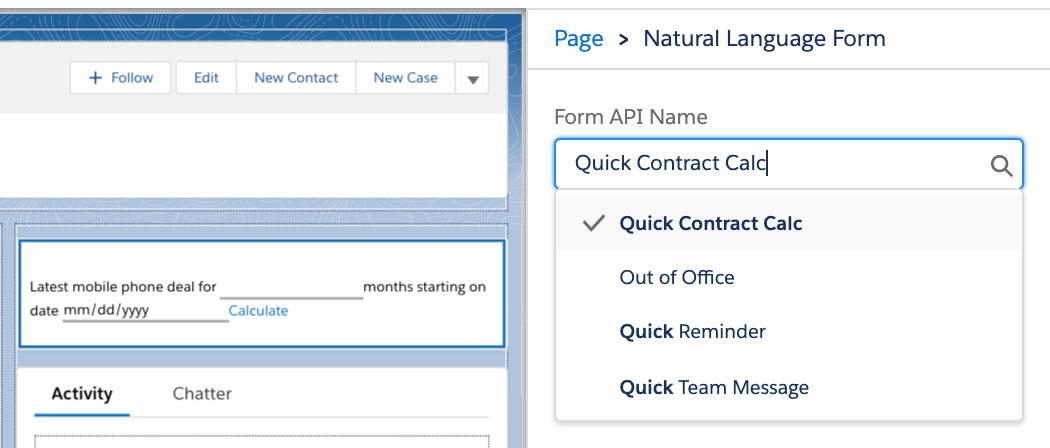
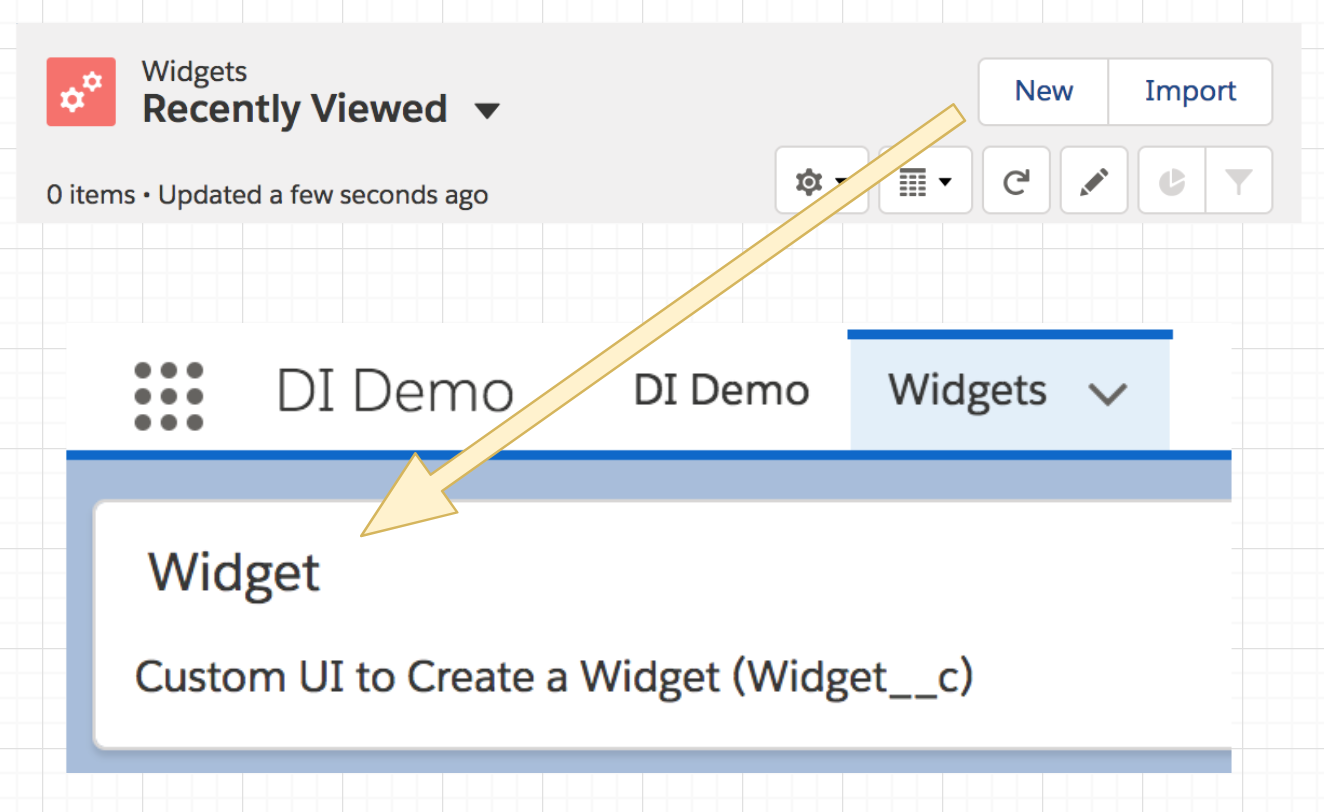
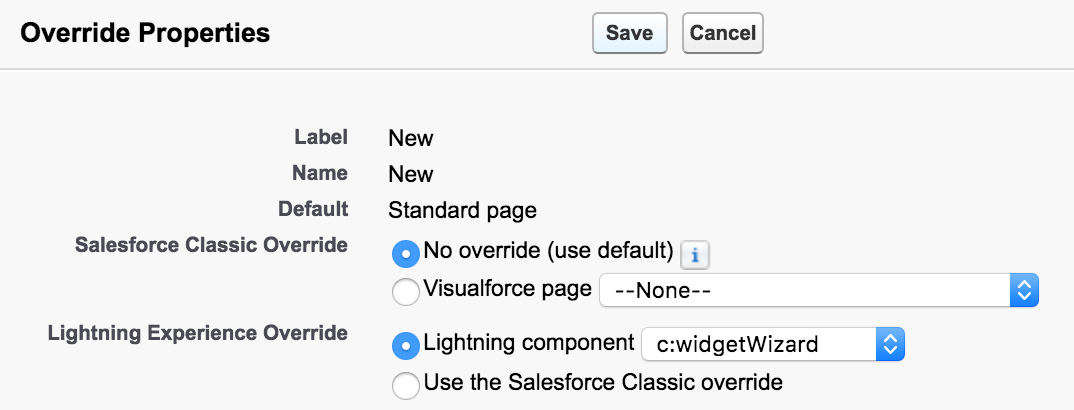
Since the third book, all but one of the Aura components have now been removed as many only existed at the time as workarounds to the lack of LWC enabled integration points. Two large chapters are dedicated to the Lightning framework itself, how it handles separation of concerns, eventing, security and its alignment with the industry Web Component standard. Completing with a section covering the ever expanding possibilities to extend vs build when thinking about your applications user experience, regardless if thats desktop, mobile or driven through the native UIs and tools such as Lightning Pages or Flow. And yes, I still love the Utility Bar integration the most – as you can see from the number of historic posts and tools on the topic here.

APIs, APIs and APIs…
Many years ago a product manager once thanked me for pushing an API strategy internally, since they appreciated first hand as a past buyer that APIs are effectively an insurance policy for buyers when it comes to unexpected feature gaps post or during implementation. Thus several of the chapters highlight the many Salesforce APIs in contextual ways.
Though its not until the integration and extensibility chapter the book really doubles down on building your own application APIs, versioning, naming and design and the value they bring to your fellow developers, customers and/or partner ecosystems. External Services is one of the most impressive aspects of integrating with the Salesforce Platform for me and it was my pleasure to update the book with an updated Heroku based API leveraging OpenAPI to get the full power of the feature – the two are a perfect combo!

And …
This blog is already in danger of becoming chapter size itself, so I will leave it here with the above highlights and before I close share my deepest thanks to this editions reviewers John M. Daniel, Sebastiano Costanzo, Arvind Narasimhan and foreword author Daniel J. Peter.
I will be popping up in the not to distant future in ApexHours (https://www.apexhours.com/) and perhaps other locations to talk in more depth about the book and likely other side topics of interest. I will update this blog as those resources arrive. Thank you all in the meantime, the Salesforce community is the best and remains very close to my heart, enjoy!
AndyInTheCloud

P.S. Suffice to say this 4th edition is an evolution of the prior three books! I would like to also thank the following fine folks for their support as past reviewers and foreword authors!
Past Reviewers and Forewords:
Matt Bingham, Steven Herod, Matt Lacey, Andrew Smith, Rohit Arora, Karanraj Samkaranarayanan, Jitendra Zaa, Joshua Burk, Peter Knolle, John Leen, Aaron Slettenhaugh, Avrom Roy-Faderman, Michael Salem, Mohith Shrivastava and Wade Wegner


 ‘m proud to host my first guest blogger!