Getting your users attention is not always easy, choosing how, when and where to notify them is critical. Ever since Lightning Experience and Salesforce Mobile came out the notification bell has been a one stop shop for Chatter and Approval notifications, regardless if you are on your desktop or your mobile device.
In beta release at time of writing is a new platform feature known as Notification Manager that allows you to send your own custom notifications to your users for anything your heart desires from the very same locations, even on a users mobile device! This blog dives into this feature and how you can integrate it into your creations regardless if you are a admin click coder, Apex developer or REST API junkie.
Getting Started
The first thing you need to do is define a new Notification Type under the Setup menu. This is a simple process that involves giving it a name and deciding what channels you want the notification to go out on, currently user desktop and mobile devices.

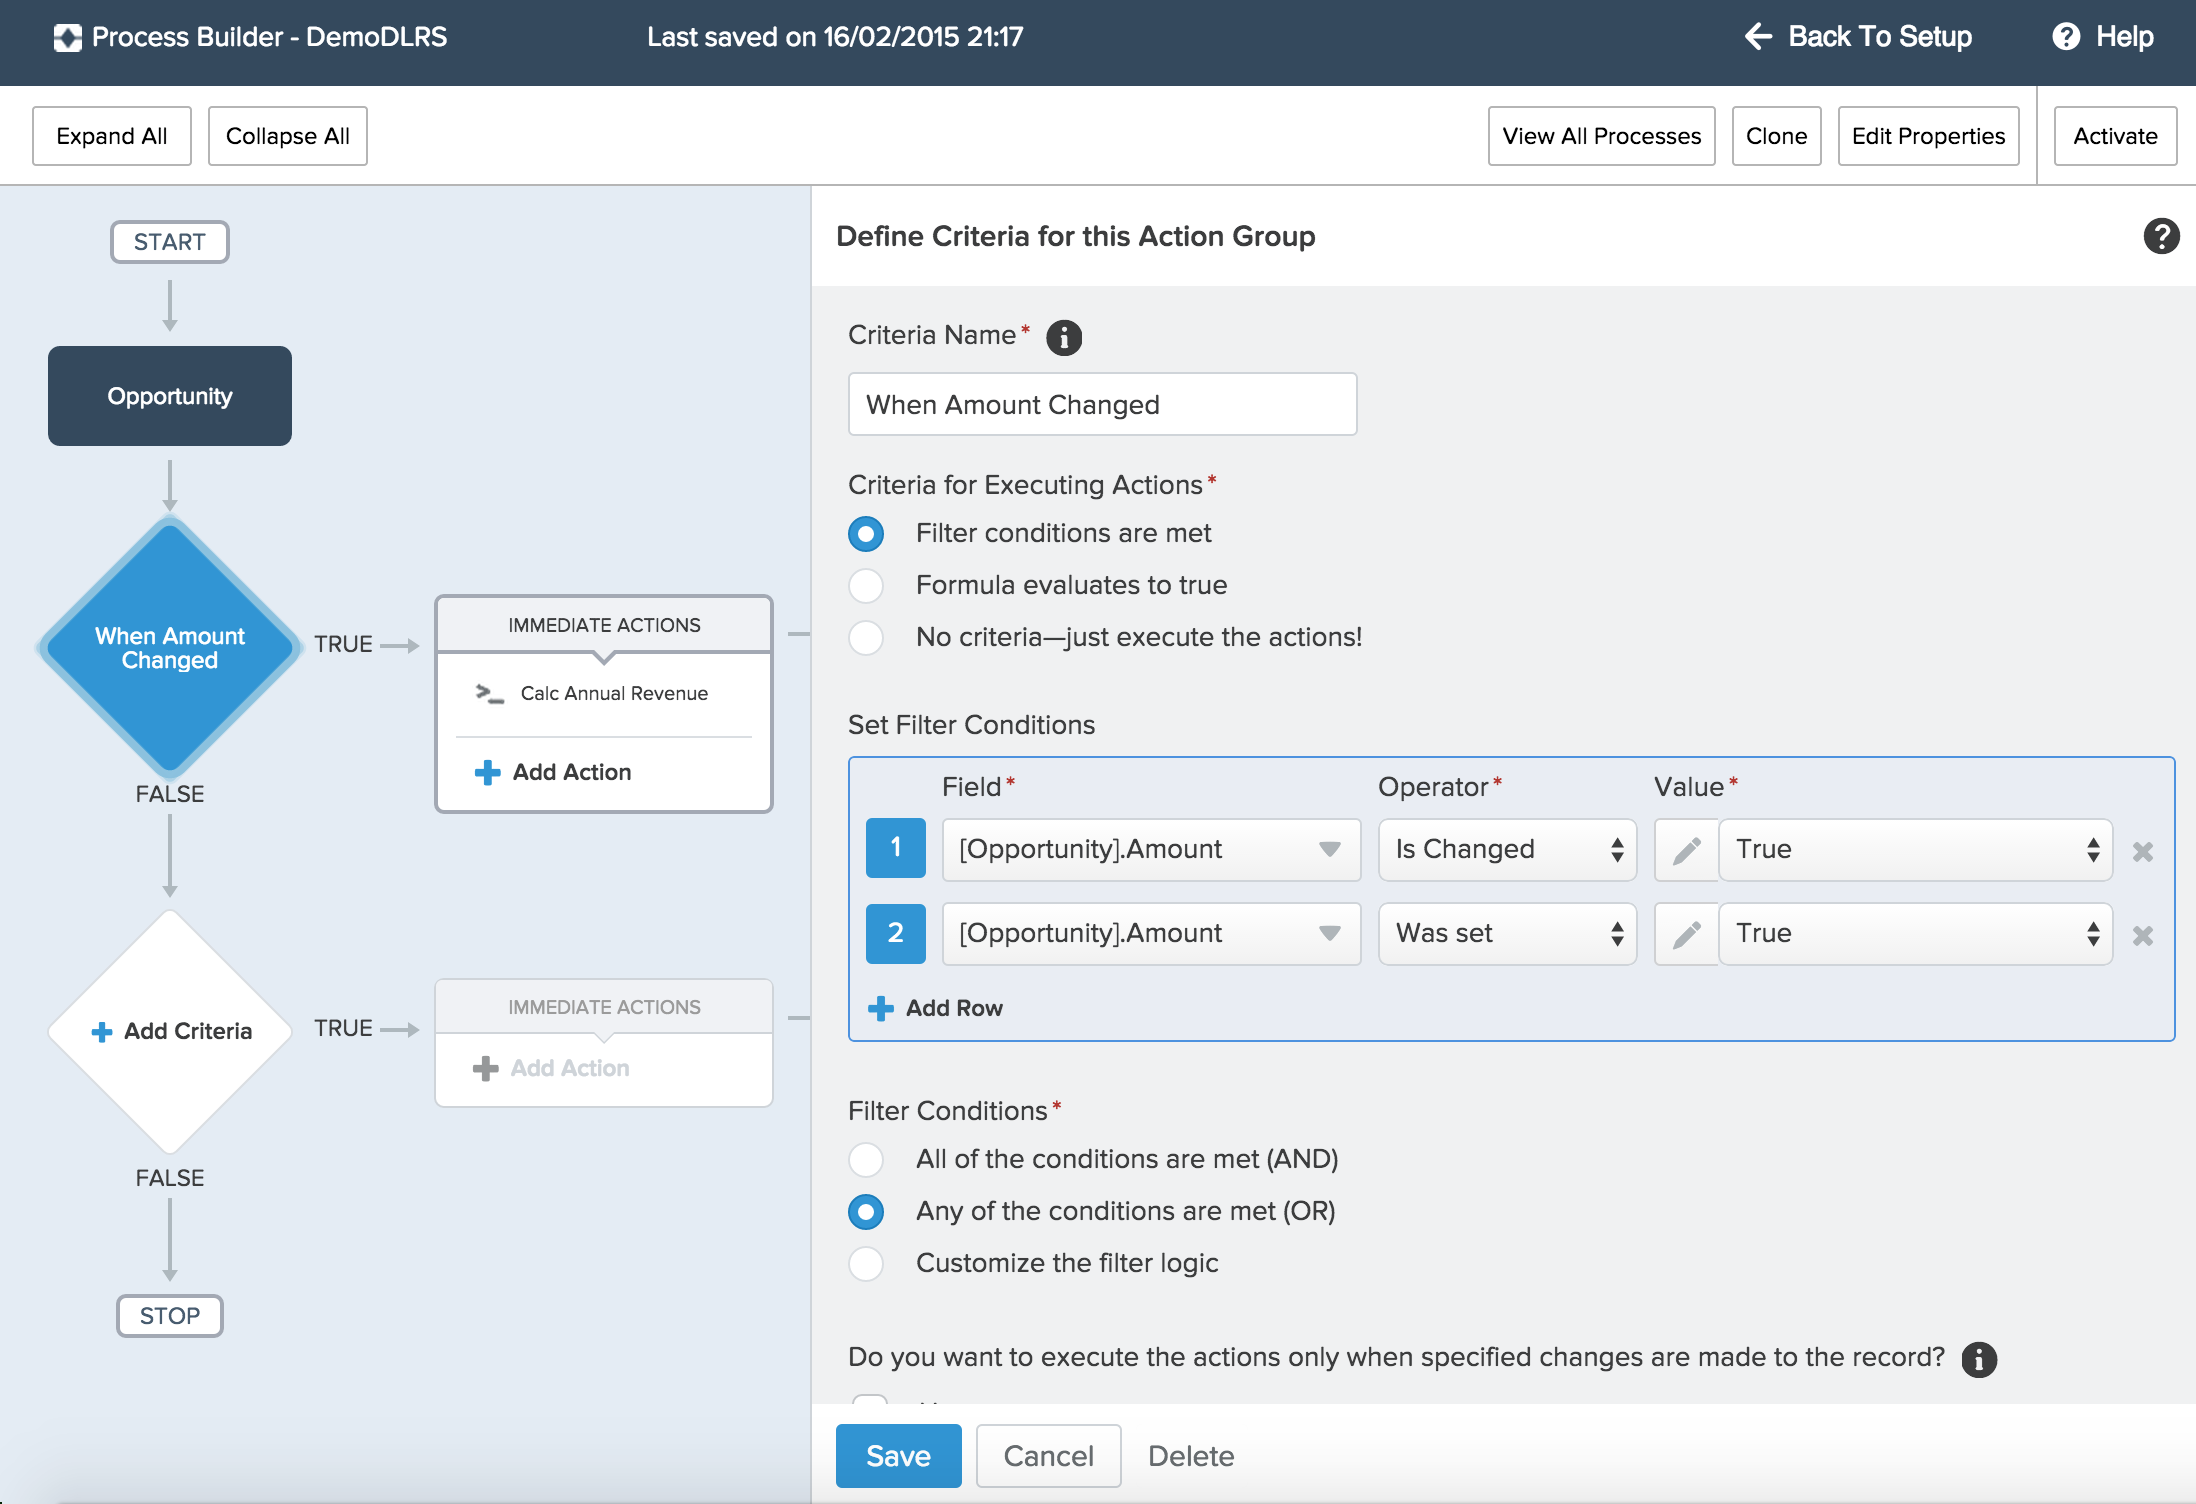
Once this has been done you can use the new Send Custom Notification action in Process Builder or Flow. This allows you to define the title and body of your notification, along with the target recipients (users, groups, queues and more) along the target record that determines the record the user sees when they click/tap the notification. The following screenshot shows an example of such an Action in Process Builder:-
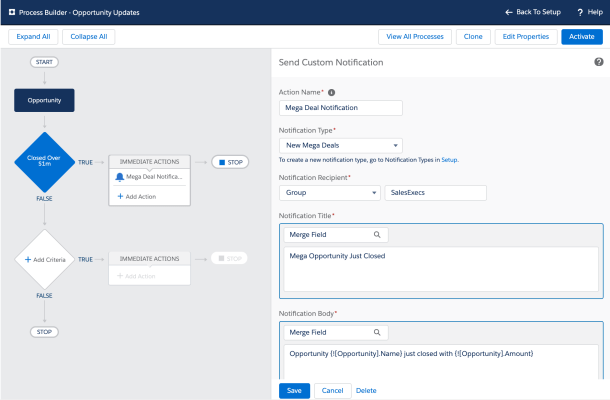

Basically that is all there is to it! You will have in a few clicks empowered yourself with the ability to reach out to not only your users desktop but the actual mobile device notification experience on each of the their mobile devices! You didn’t have to learn how to write a mobile app, figure out how to do mobile notifications, register things with Google or Apple. I am honestly blown away at how easy and powerful this is!
So it is pretty easy to to send notifications this way from Process Builder processes driven by record updates from the user and also reference field values to customize the notification text. However in the ever expanding world of Platform Events, how do we send custom notifications based on Platform Events?
Sending Custom Notifications for Batch Apex Job Failures
One of my oldest and most popular blog posts discussed design best practices around Batch Apex jobs. One of the considerations it calls out is how important it is to route errors that occur in the background back to the user. Fast forward a bit to this blog, where I covered the new BatchApexError Platform Event as a means to capture and route batch errors (even uncatchable exceptions) in near realtime. It also describes strategy to enabled users to retry failed jobs. What it didn’t really solve, is letting them know something had gone wrong without them checking a custom tab. Let’s change that!
Process Builder is now able to subscribe to the standard BatchApexErrorEvent and thus enables you as an admin to apply filter and routing logic on failed batch jobs. When combined with custom notifications those errors can now be routed to users devices and/or desktops in realtime. While Process Builder can subscribe to events it does have some restrictions on what it can do with the event data itself. Thus we are going to call an autolaunch Flow from Process Builder to actually handle the event and send the custom notification from within Flow. If you are reading this wondering if your Apex code can get in on the action, the answer is yes (ish), more on this later though. The declarative solution utilizes one Process Builder process and two Flows. The separation of concerns between them is shown in the diagram below:-
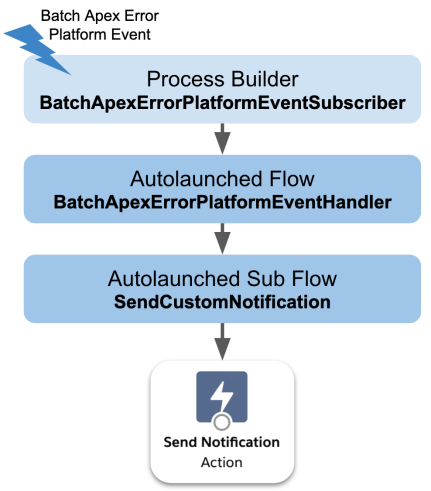
Let’s work from the bottom to the top to understand why I decided to split it up this way. Firstly, SendCustomNotification is a Sub Flow (callable by other Flows) and is a pretty simple wrapper around the new Send Custom Notification action shown above. You can take a closer look at this later through the sample code repository here.
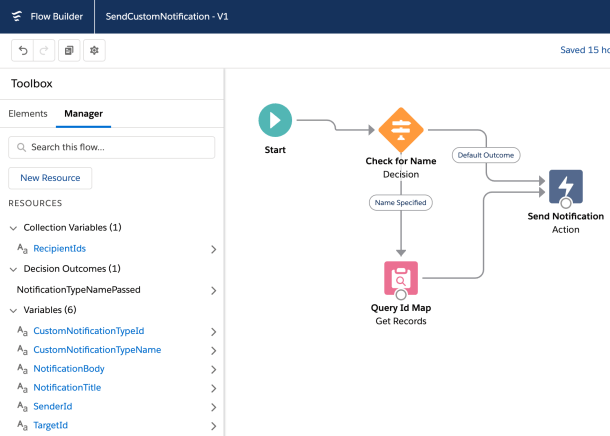
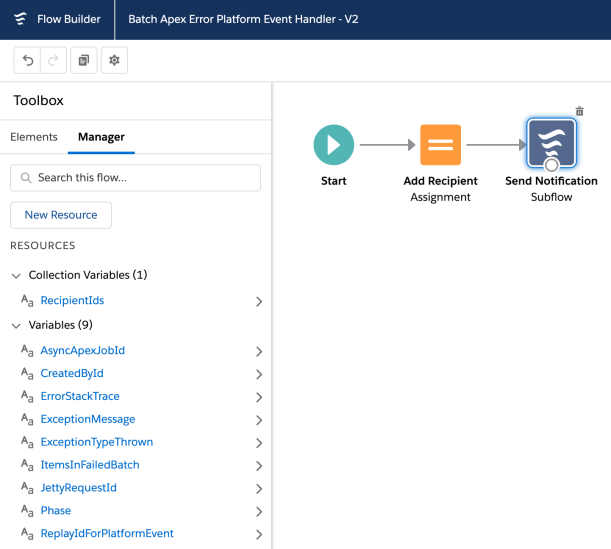
Next the BatchApexErrorPlatformEventHandler Flow defines a set of input variables that are populated from the Process Builder process. These variables match the fields and types per the definition of the Batch Apex Error Event here. The only other thing it does is add the Id of the user that generated the event (aka the user who submitted the failed job) to the list of recipients passed to the SendCustomNotification sub flow above. This could also be a Group Id if you wanted to send the notification further.
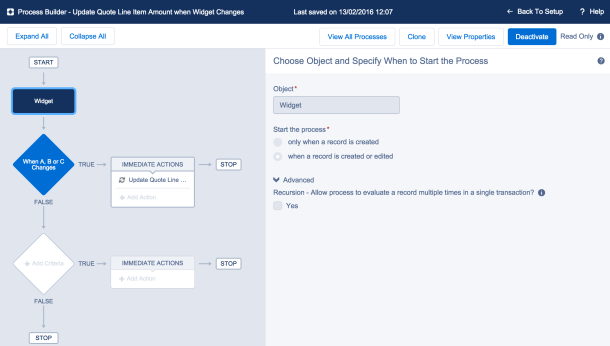
Lastly, in the screenshot below you see the Process Builder that subscribes to the Batch Apex Error Event and maps the event field values to the input variables exposed from BatchApexErrorPlatformEventHandler Flow via the EventReference. The example here is very simple, but you can now imagine how you can add other filter criteria to this process that allows you to inspect which Batch Apex job failed and route and/or adjust messaging in the notifications accordingly, all done declaratively of course!

NOTE: It is not immediately apparent in all cases that you can access the event fields from Process Builder, since the documentation states them as not supported within formulas. I want to give a shout out to Alex Edelstein PM for Flow for clarifying that it is possible! Check out his amazing blog around all things Flow here. Finally note that Process Builder requires an Object to map the incoming event to. In this case I mapped to a User record using the CreatedById field on the event.
Sending Custom Notifications from Code
The Send Custom Notification action is also exposed via the Salesforce Action REST API defined here (hint hint for Doug Ayers Mass Action tool to support it). You can of course attempt to call this REST API via Apex as well. While there is currently no native Apex Action API, it turns out calling the above SendCustomNotification Flow from Apex works pretty well meanwhile. I have written a small wrapper around this technique to make it a little more elegant to perform from Apex and it also serves to abstract away this hopefully temporary workaround for Apex developers.
new CustomNotification()
.type('MyNotificationType')
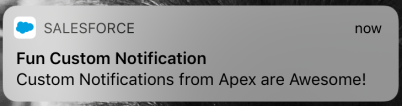
.title('Fun Custom Notification')
.body('Custom Notifications are Awesome!')
.sendToCurrentUser();
The following Apex code results in this notification appearing on your device!
This CustomNotification helper class is included in the sample code for this blog and leverages another class I wrote that wraps the native Apex Flow API. I used this wrapper because it allowed me to mock the actual Flow invocation since there is no way as far as I can see to assert the notification was actually sent.
NOTE: When sending custom notifications via declarative tools and/or via code I did confirm in my testing that they are included in the current transaction. Also I recommend you always avoid calling Flow in loops in your Apex code, instead make your Flows take list variables (aka try to bulkify Flows called from Apex). Though not shown in the Apex above, the wrapped Flow takes a list of recipients.
Summary
You can find all the code for this blog in sample code repository here. So there you have it, custom mobile and desktop notifications sent from Process Builder, Flow, Apex and REST API. Keep in mind of course at time of writing this is a Beta feature and thus read the clause in the documentation carefully. Now go forth and start thinking of all the areas you can enable with this feature!
P.S. Check out another new cool feature called Lightning In-App Guidance.


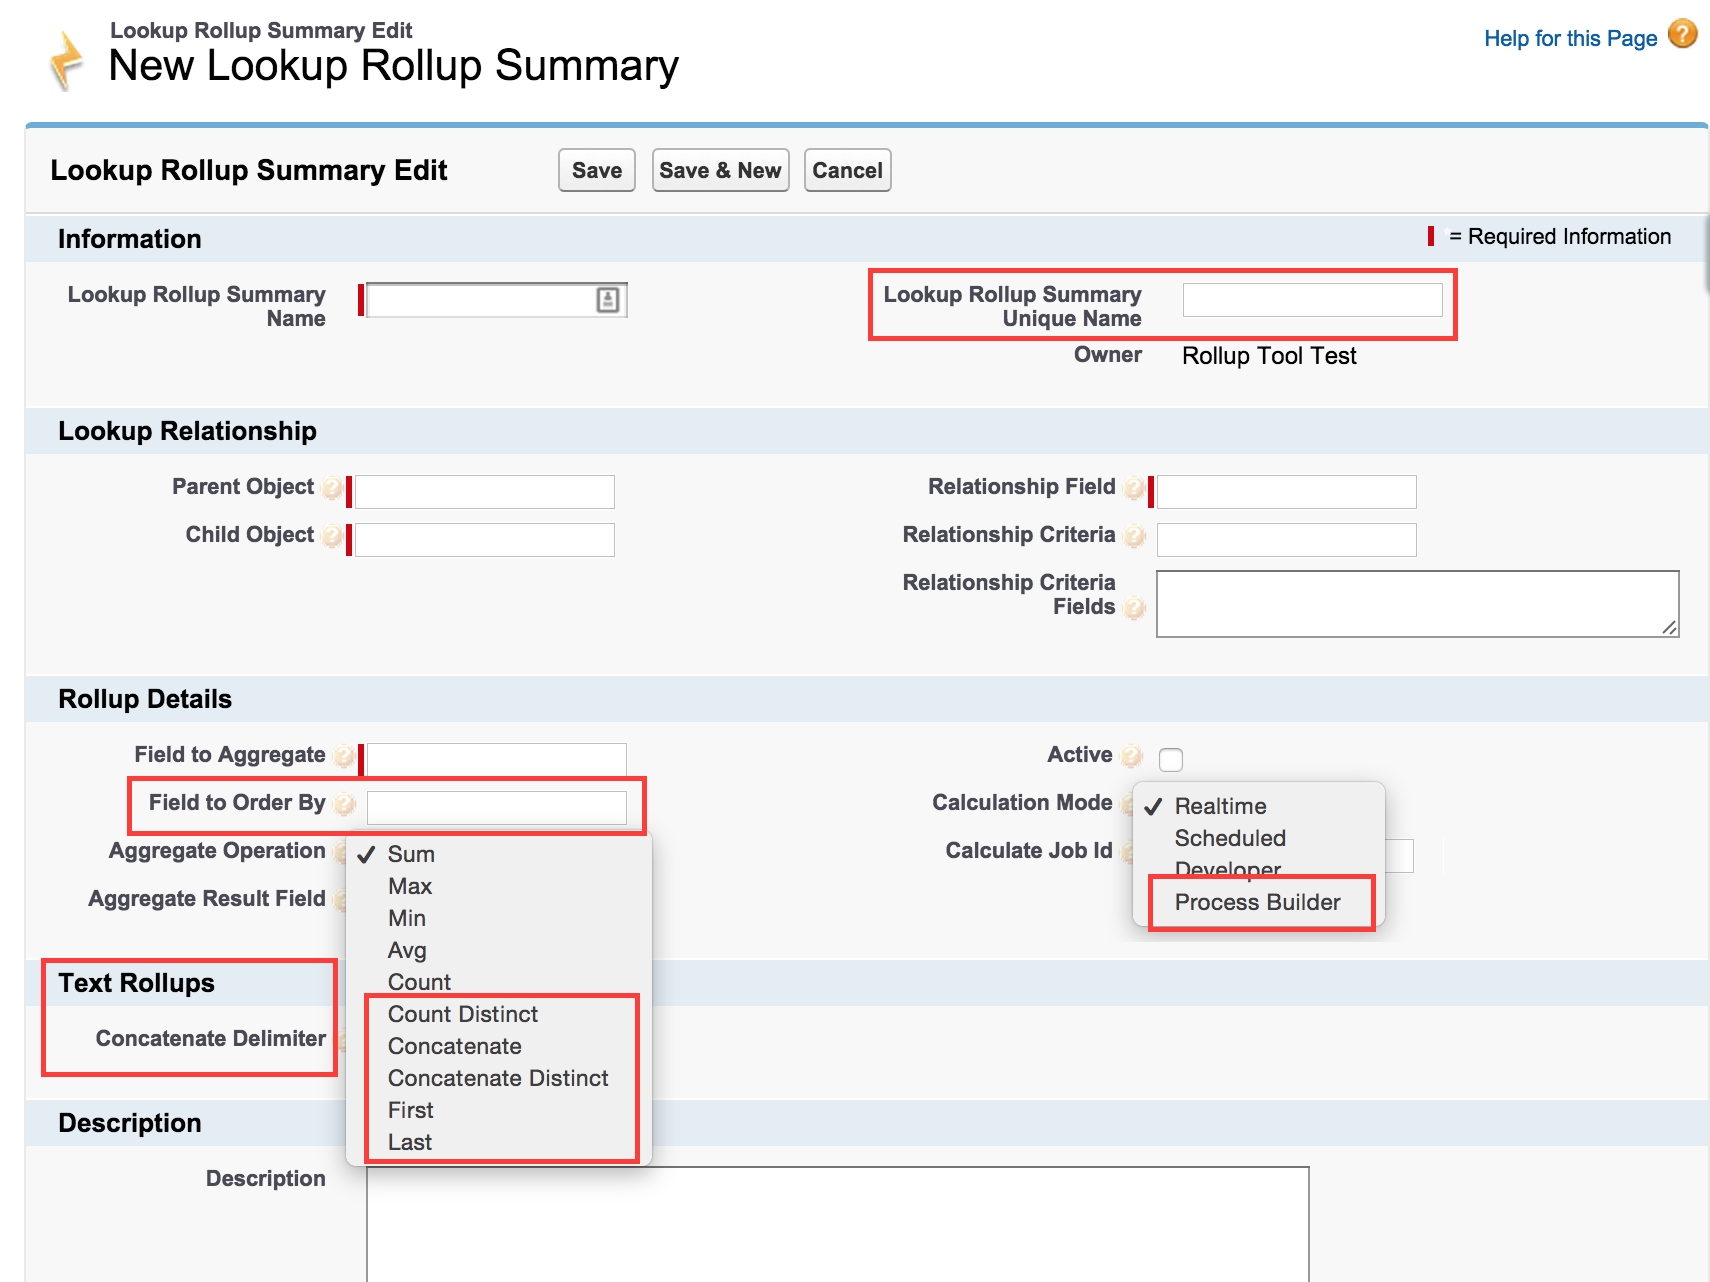
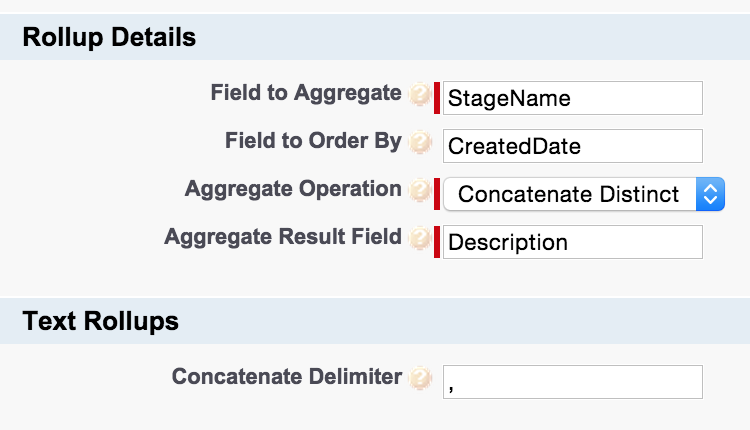
 Either way i knew i had to have some kind of physical field other than a Formula field on the Quote Line Item object to notify the rollup tool of a change that would trigger a recalculate of the Quote > Total. I called this field Amount (Shadow) in this case, i also left it off my layout.
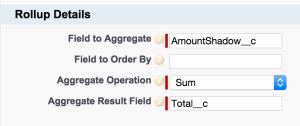


 Immediately i set about to rectify this! With a mission to allow the
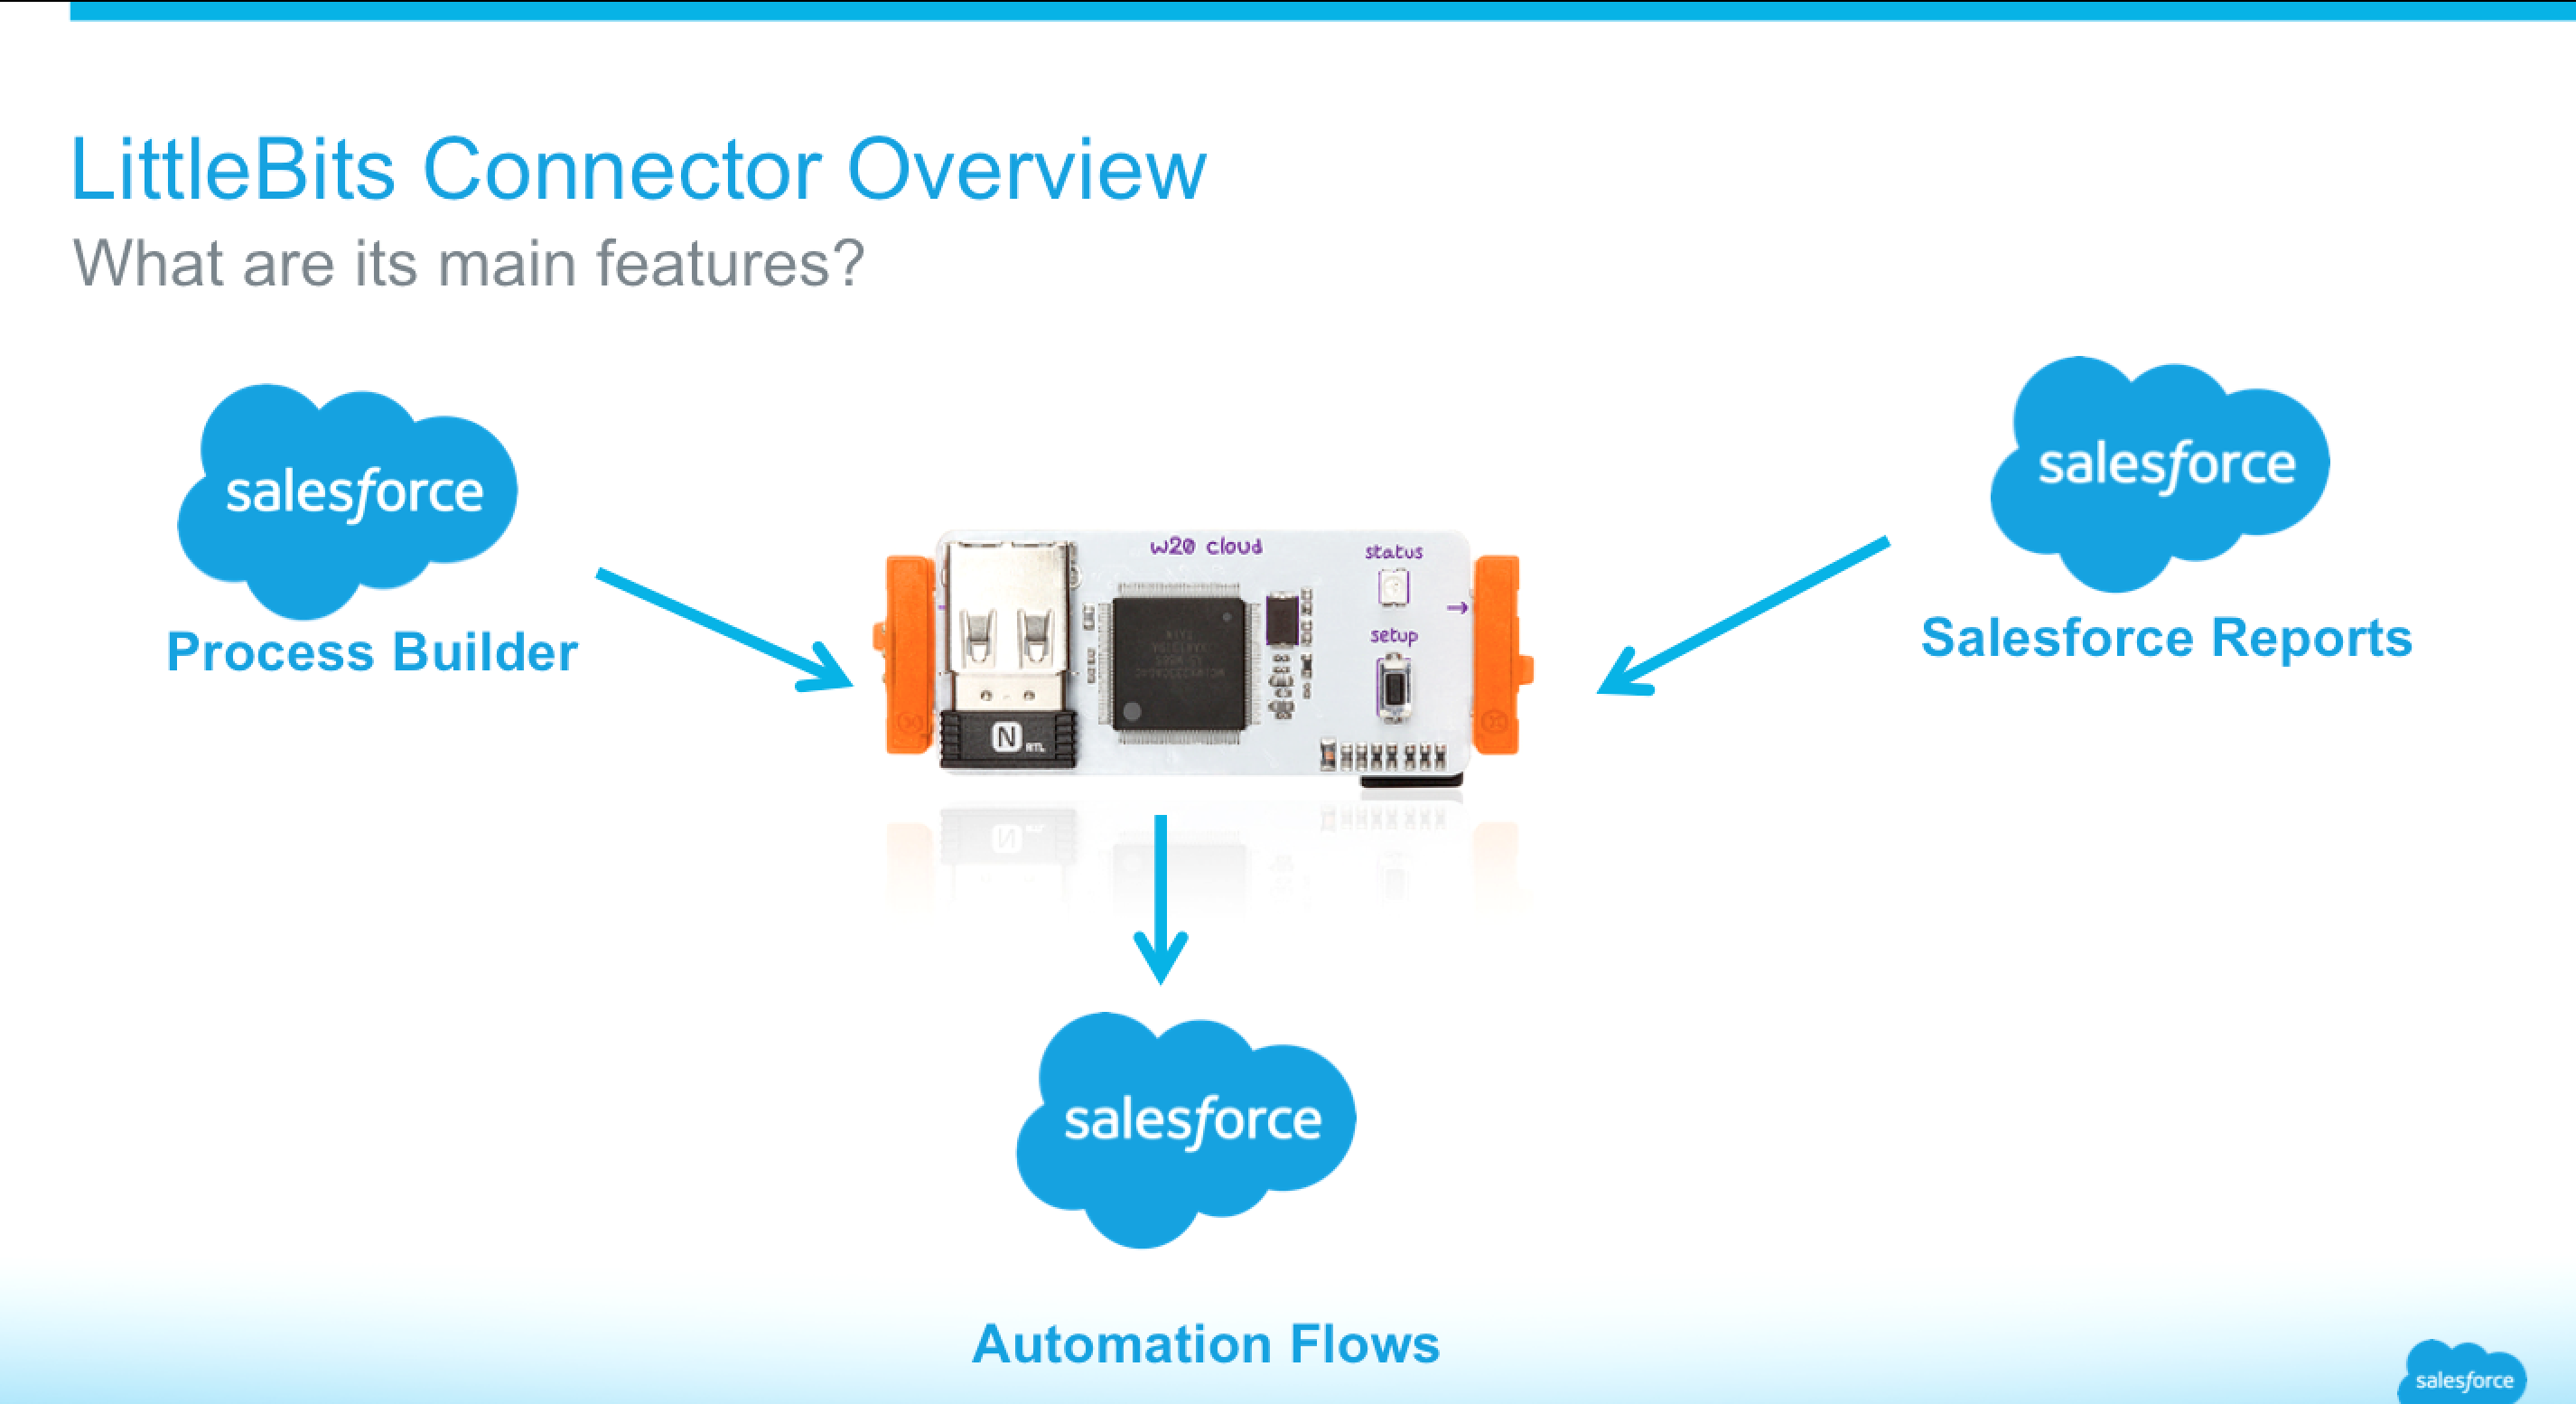
 If you’ve been following my blog, you’ll have already read my earlier
 Fellow Salesforce MVP,
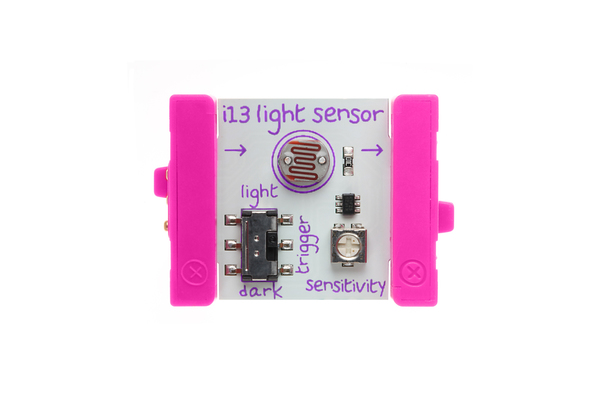


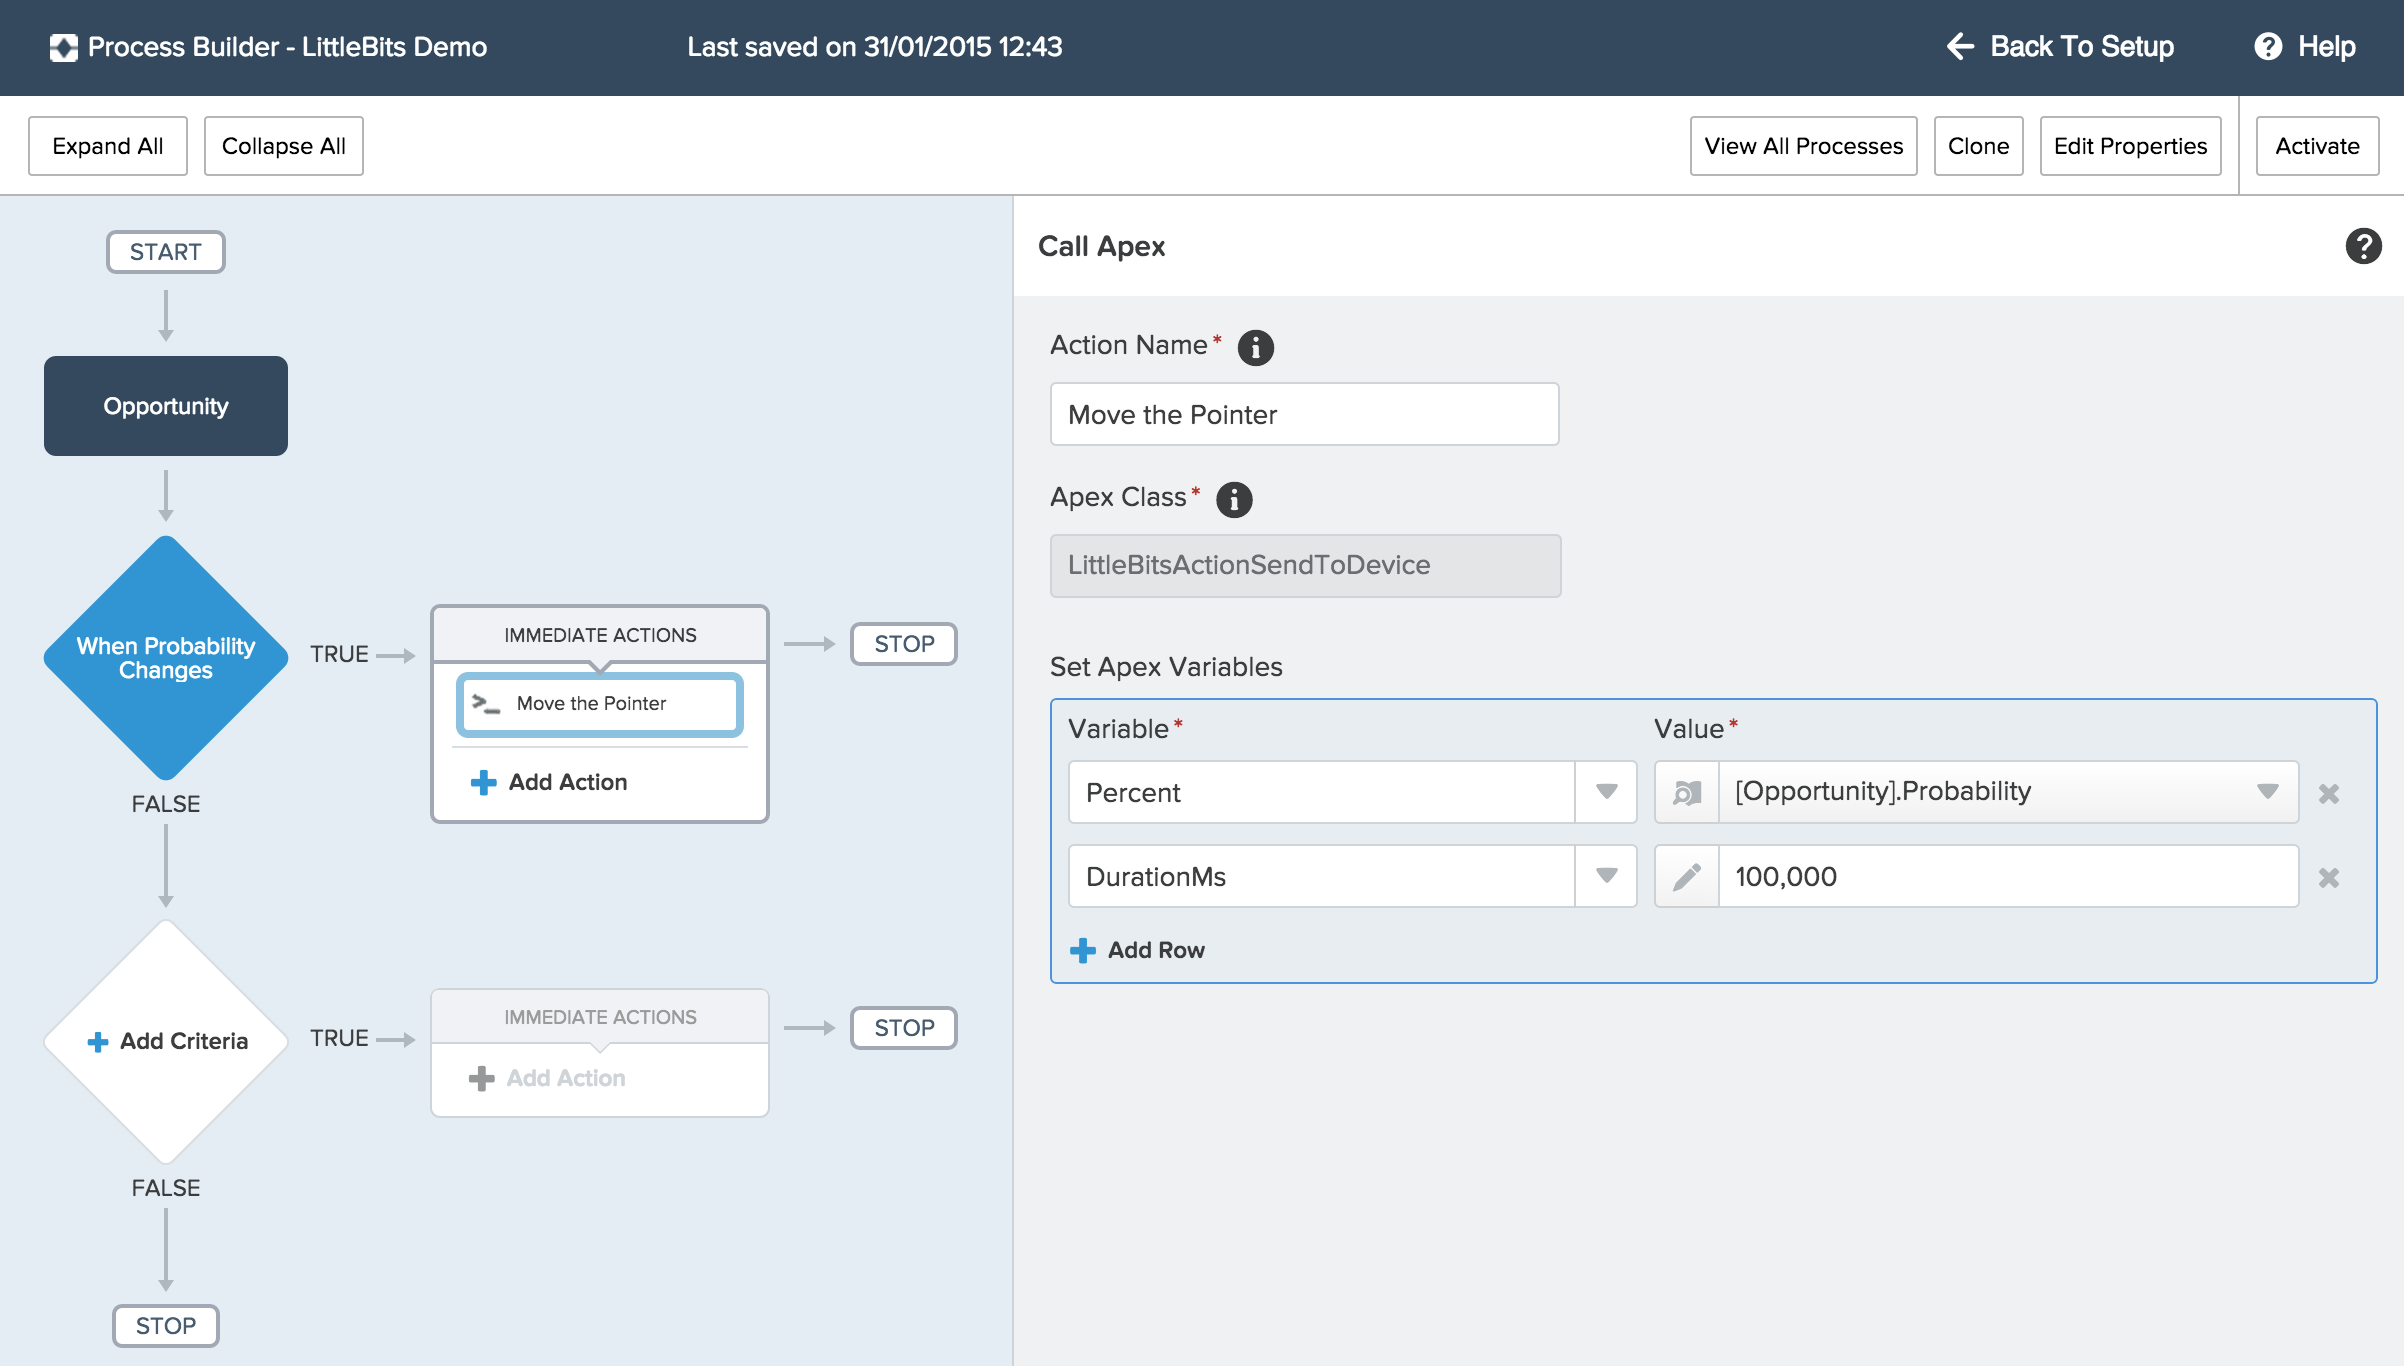
 I have just spent a very enjoyable Saturday morning in my Spring’15 Preview org with a special build of the LittleBits Connector. That leverages the ability for Process Builder to callout to specially annotated Apex code that in turn calls out to the LittleBits Cloud API.