

As readers of my blog will know I am a big fan of the rich features the Lightning Experience UI provides to developers. Having blogged several times about the amazing Utility Bar, I have been keen to explore new possibilities with the new Background Utility feature. These are utilities that have no UI so do not use up space in the Utility Bar. Instead, they sit in the background monitoring things like other events generated by the user. One such documented use case is the possibility to monitor keyboard events! And so the Custom Keyboard Shortcut Component has been born! This component effectively runs Flows based on keyboard shortcuts defined by the admin! More on this later…

You may or may not know that Lightning Experience actually already provides some standard keyboard shortcut cuts? Just press Cmd+/ (Mac) or Ctrl+/ (Windows) to get a nice summary of them!
However, per the standard shortcut documentation, it’s not possible to add custom ones. By using the new lightning:backgroundUtilityItem interface we can rectify this. This blog explains a basic hardcoded example component and also introduces an open source component (installable package provided) that links admin defined keyboard shortcuts to Flows and certain navigation events.
In just a few lines of markup and JavaScript code you can get a basic example up and running.
<aura:component implements="lightning:backgroundUtilityItem" >
	<aura:handler name="init" value="{!this}" action="{!c.init}" />
</aura:component>
The component controller simply uses the standard addEventListener method. You can also inspect the keydown event properties to determine what keys are pressed, such as Shift or Control plus another key. This example simply determines if H is pressed and navigates to Home.
({
   init: function(component, event, helper) {
      window.addEventListener('keydown', function(e) {
      if (e.key === 'H') {
         $A.get('e.force:navigateToURL').fire({ url: '/lightning/page/home' })
      }
    });
  }
})
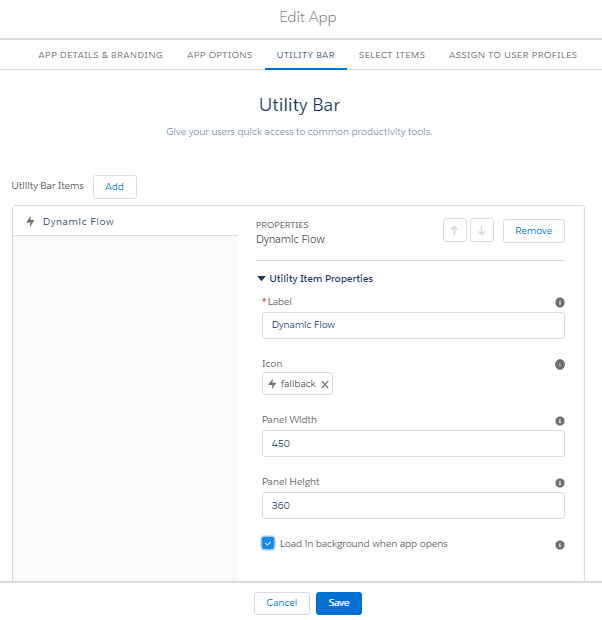
 Once deployed go to the App Manager under Setup and add the component to the Utility Items list and that’s it! Note that the component has a different icon indicating it’s a non-visual component. Neat!
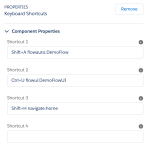
Of course, I could not simply leave things like this, so I set about making a more dynamic version. The configuration of the Custom Keyboard Shortcut component is shown at the top of this blog. It’s leveraging the fact that when you configure a Utility Bar component the App Manager inspects the .design file for the component to understand what attributes the component needs the user to configure. At runtime, the controller logic then parses the 9 attributes containing the keyboard shortcuts entered by the user into an internal map that is used by the keyboard event handler to match actions against keyboard activity.
Once you have installed the component either via a package install (admin friendly) or via sfdx force:source:deploy (devs). Add the component within the App Manager to configure keyboard shortcuts.
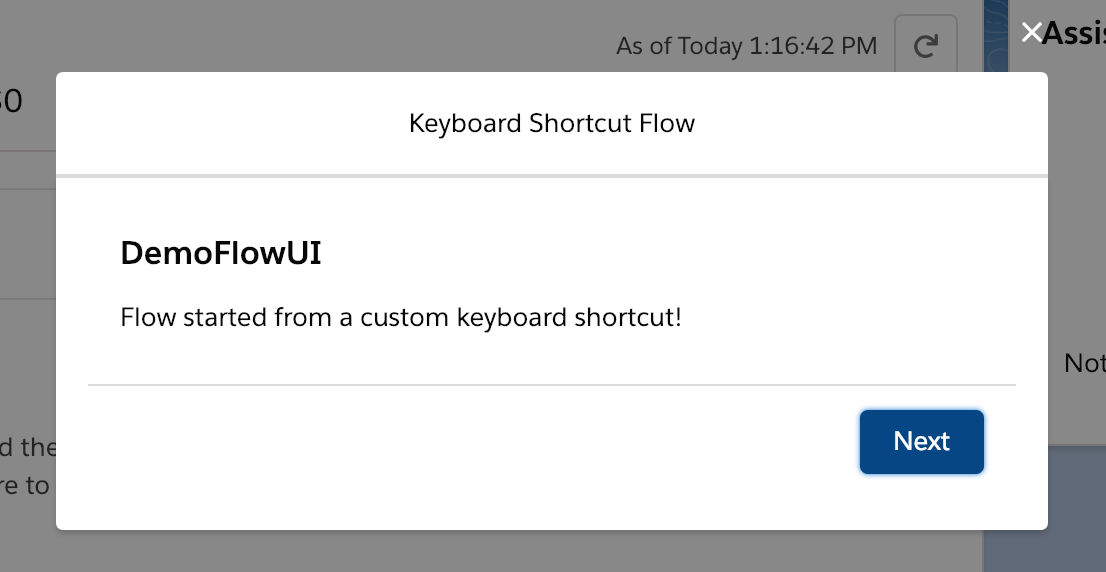
Through configuration you can connect keyboard shortcuts to the following:-
- Open a UI Flow in a modal popup
- Run an Autolaunch Flow
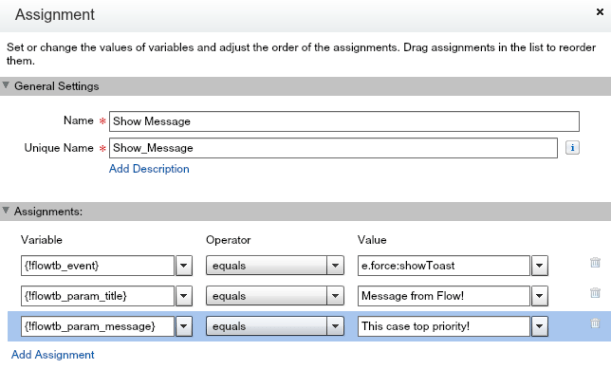
- Display popup messages communicating the actions taken by the flow
- Navigate the user to the Home tab
- Navigate the user to records created by the flow

Further details on configuring the component can be found in the README here. Finally, you may recall that I used a Background Utility in this years Dreamforce presentation. In this case, it was using the new Streaming Component to listen to Platform Events. You can find the source code here.
Have fun!
 In this blog, I want to highlight a couple of great UI features provided by the

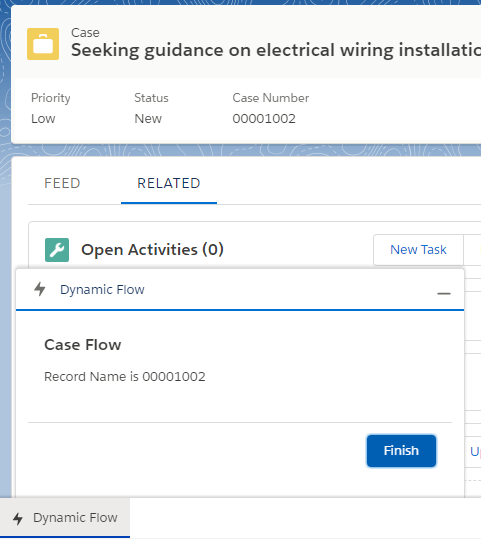
 The Dynamic Flow Component (DFC) allows you to further extend your use of auto launch and screen
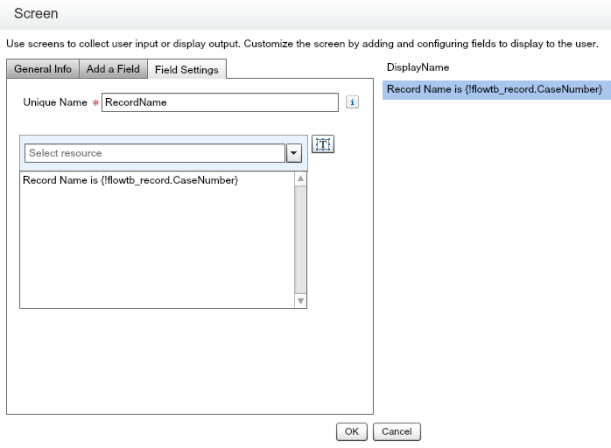
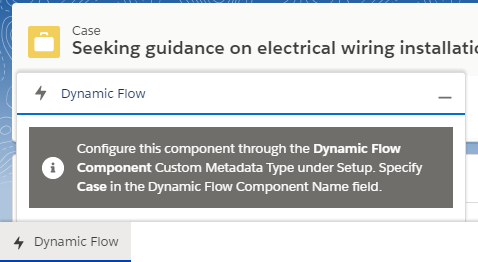
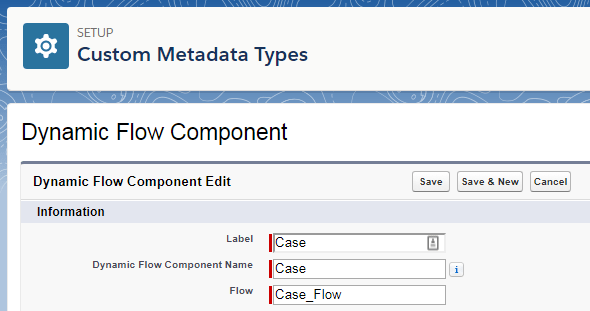

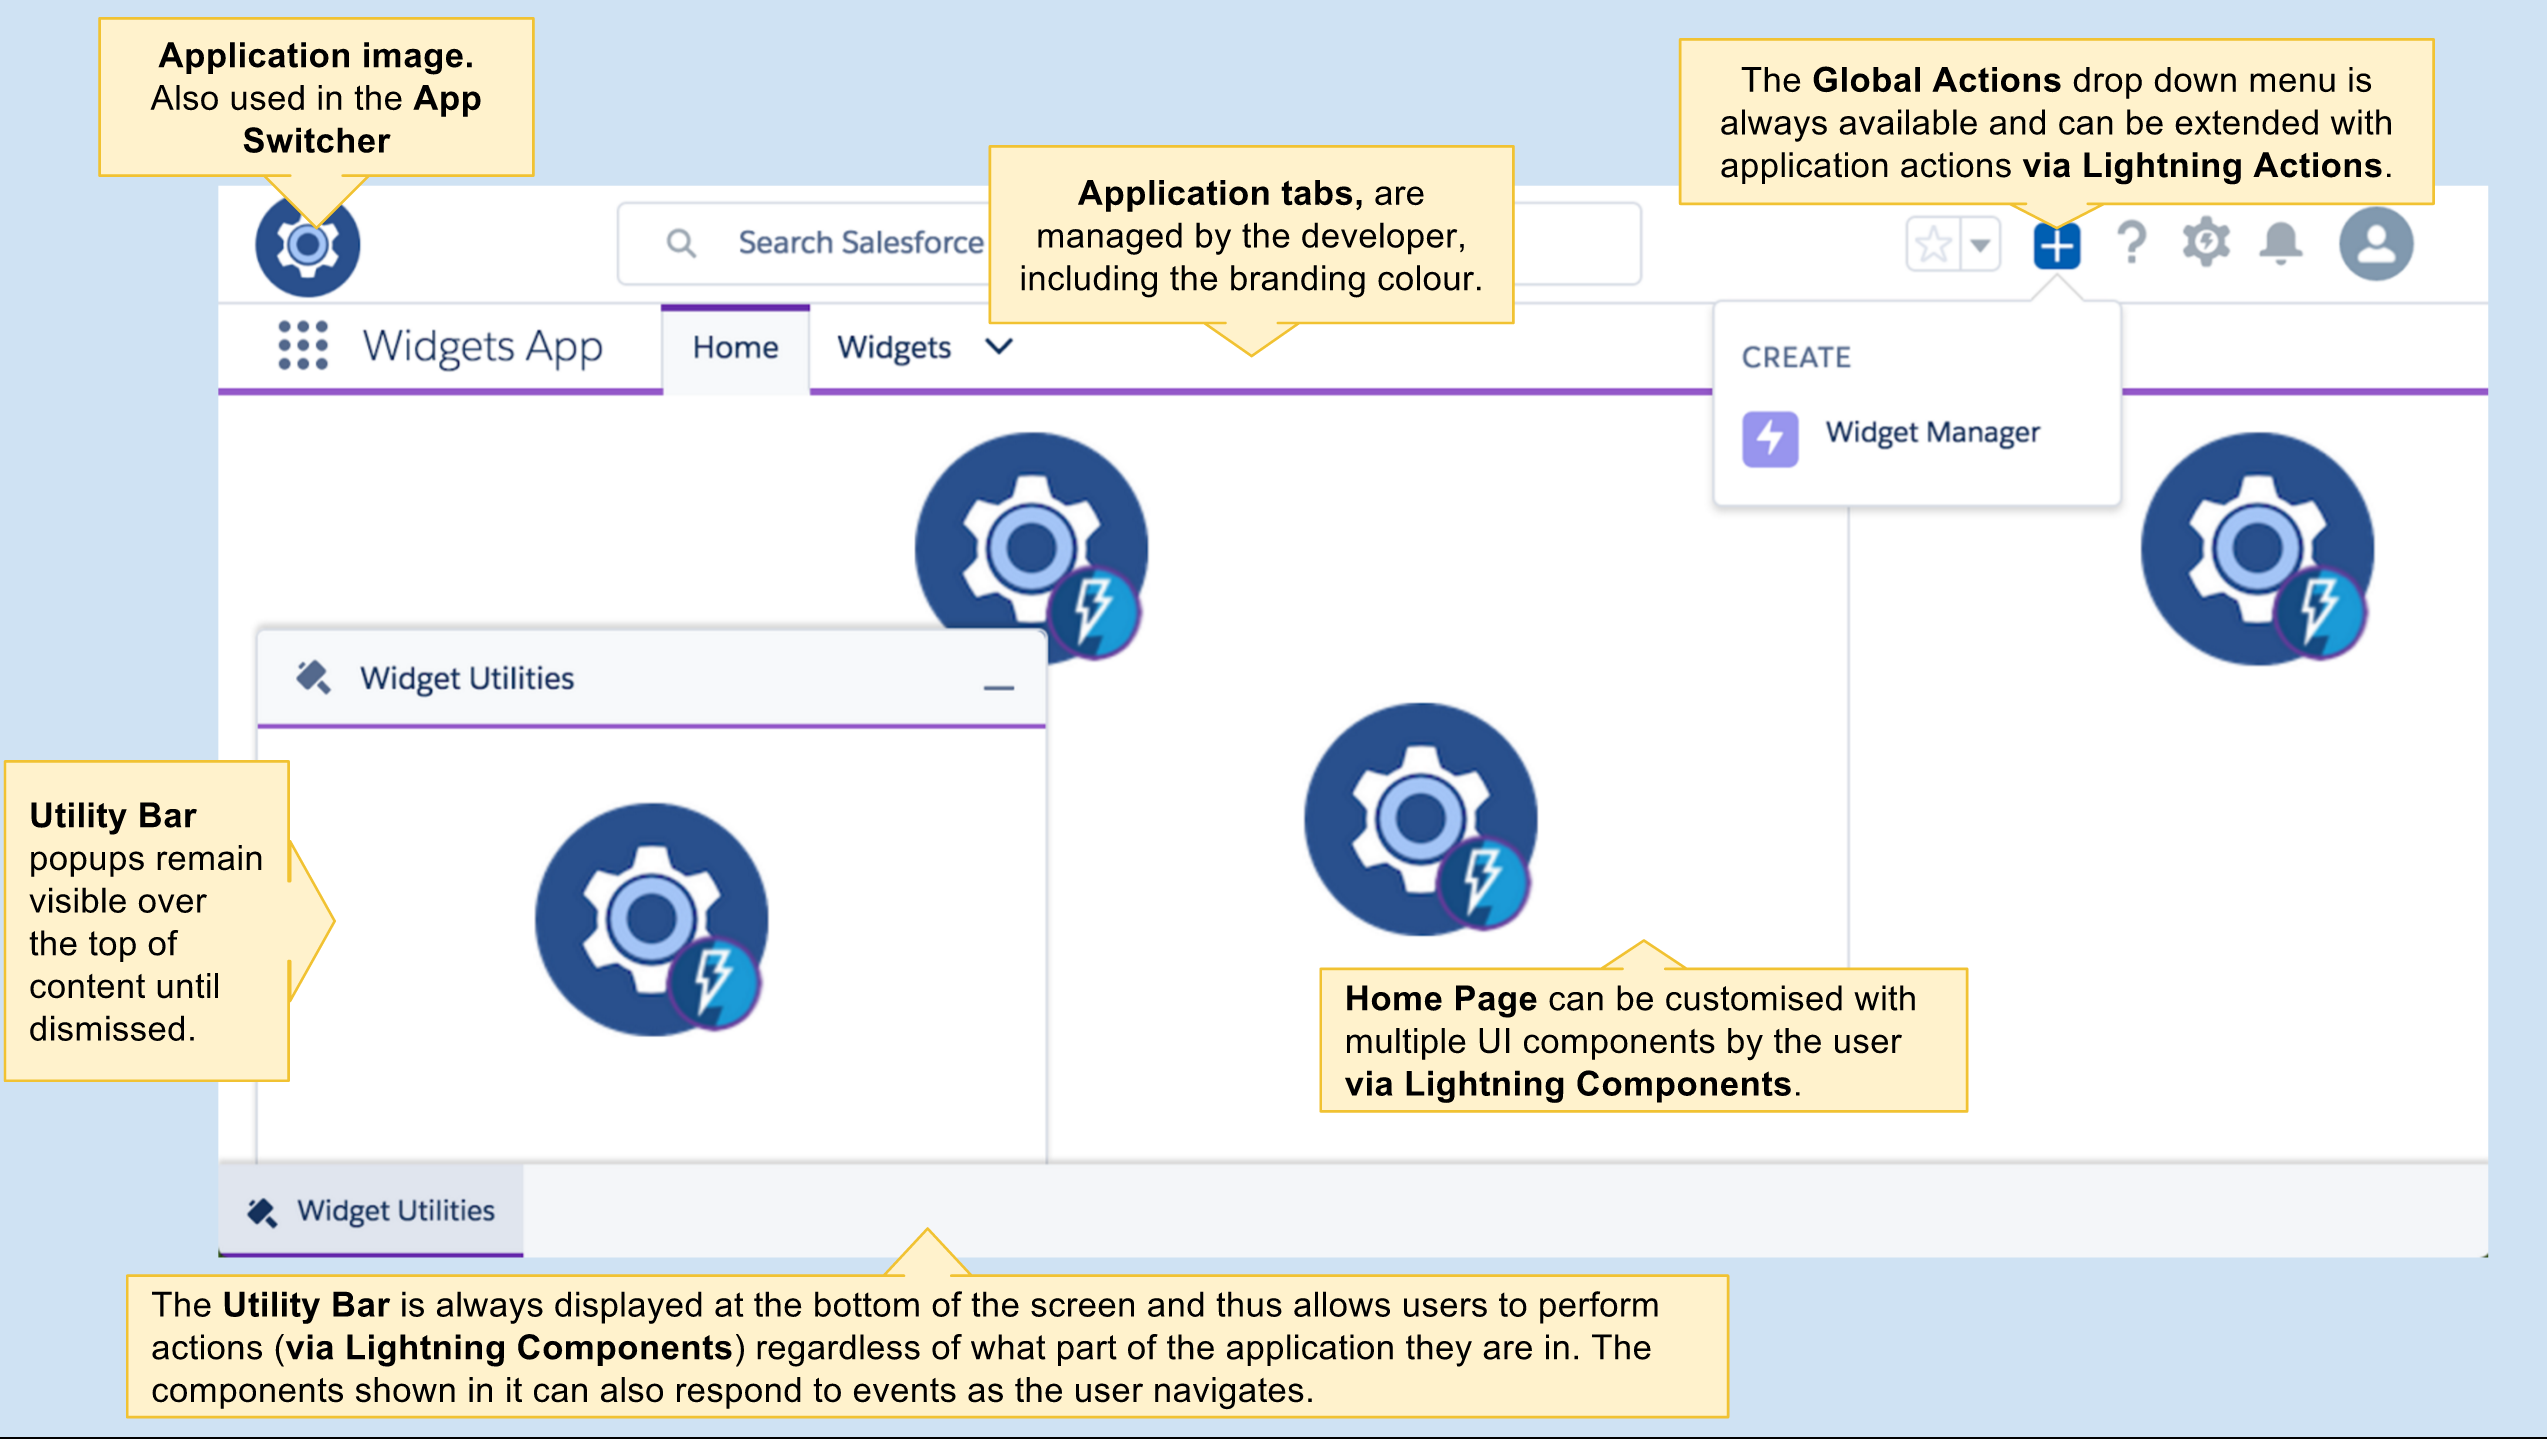
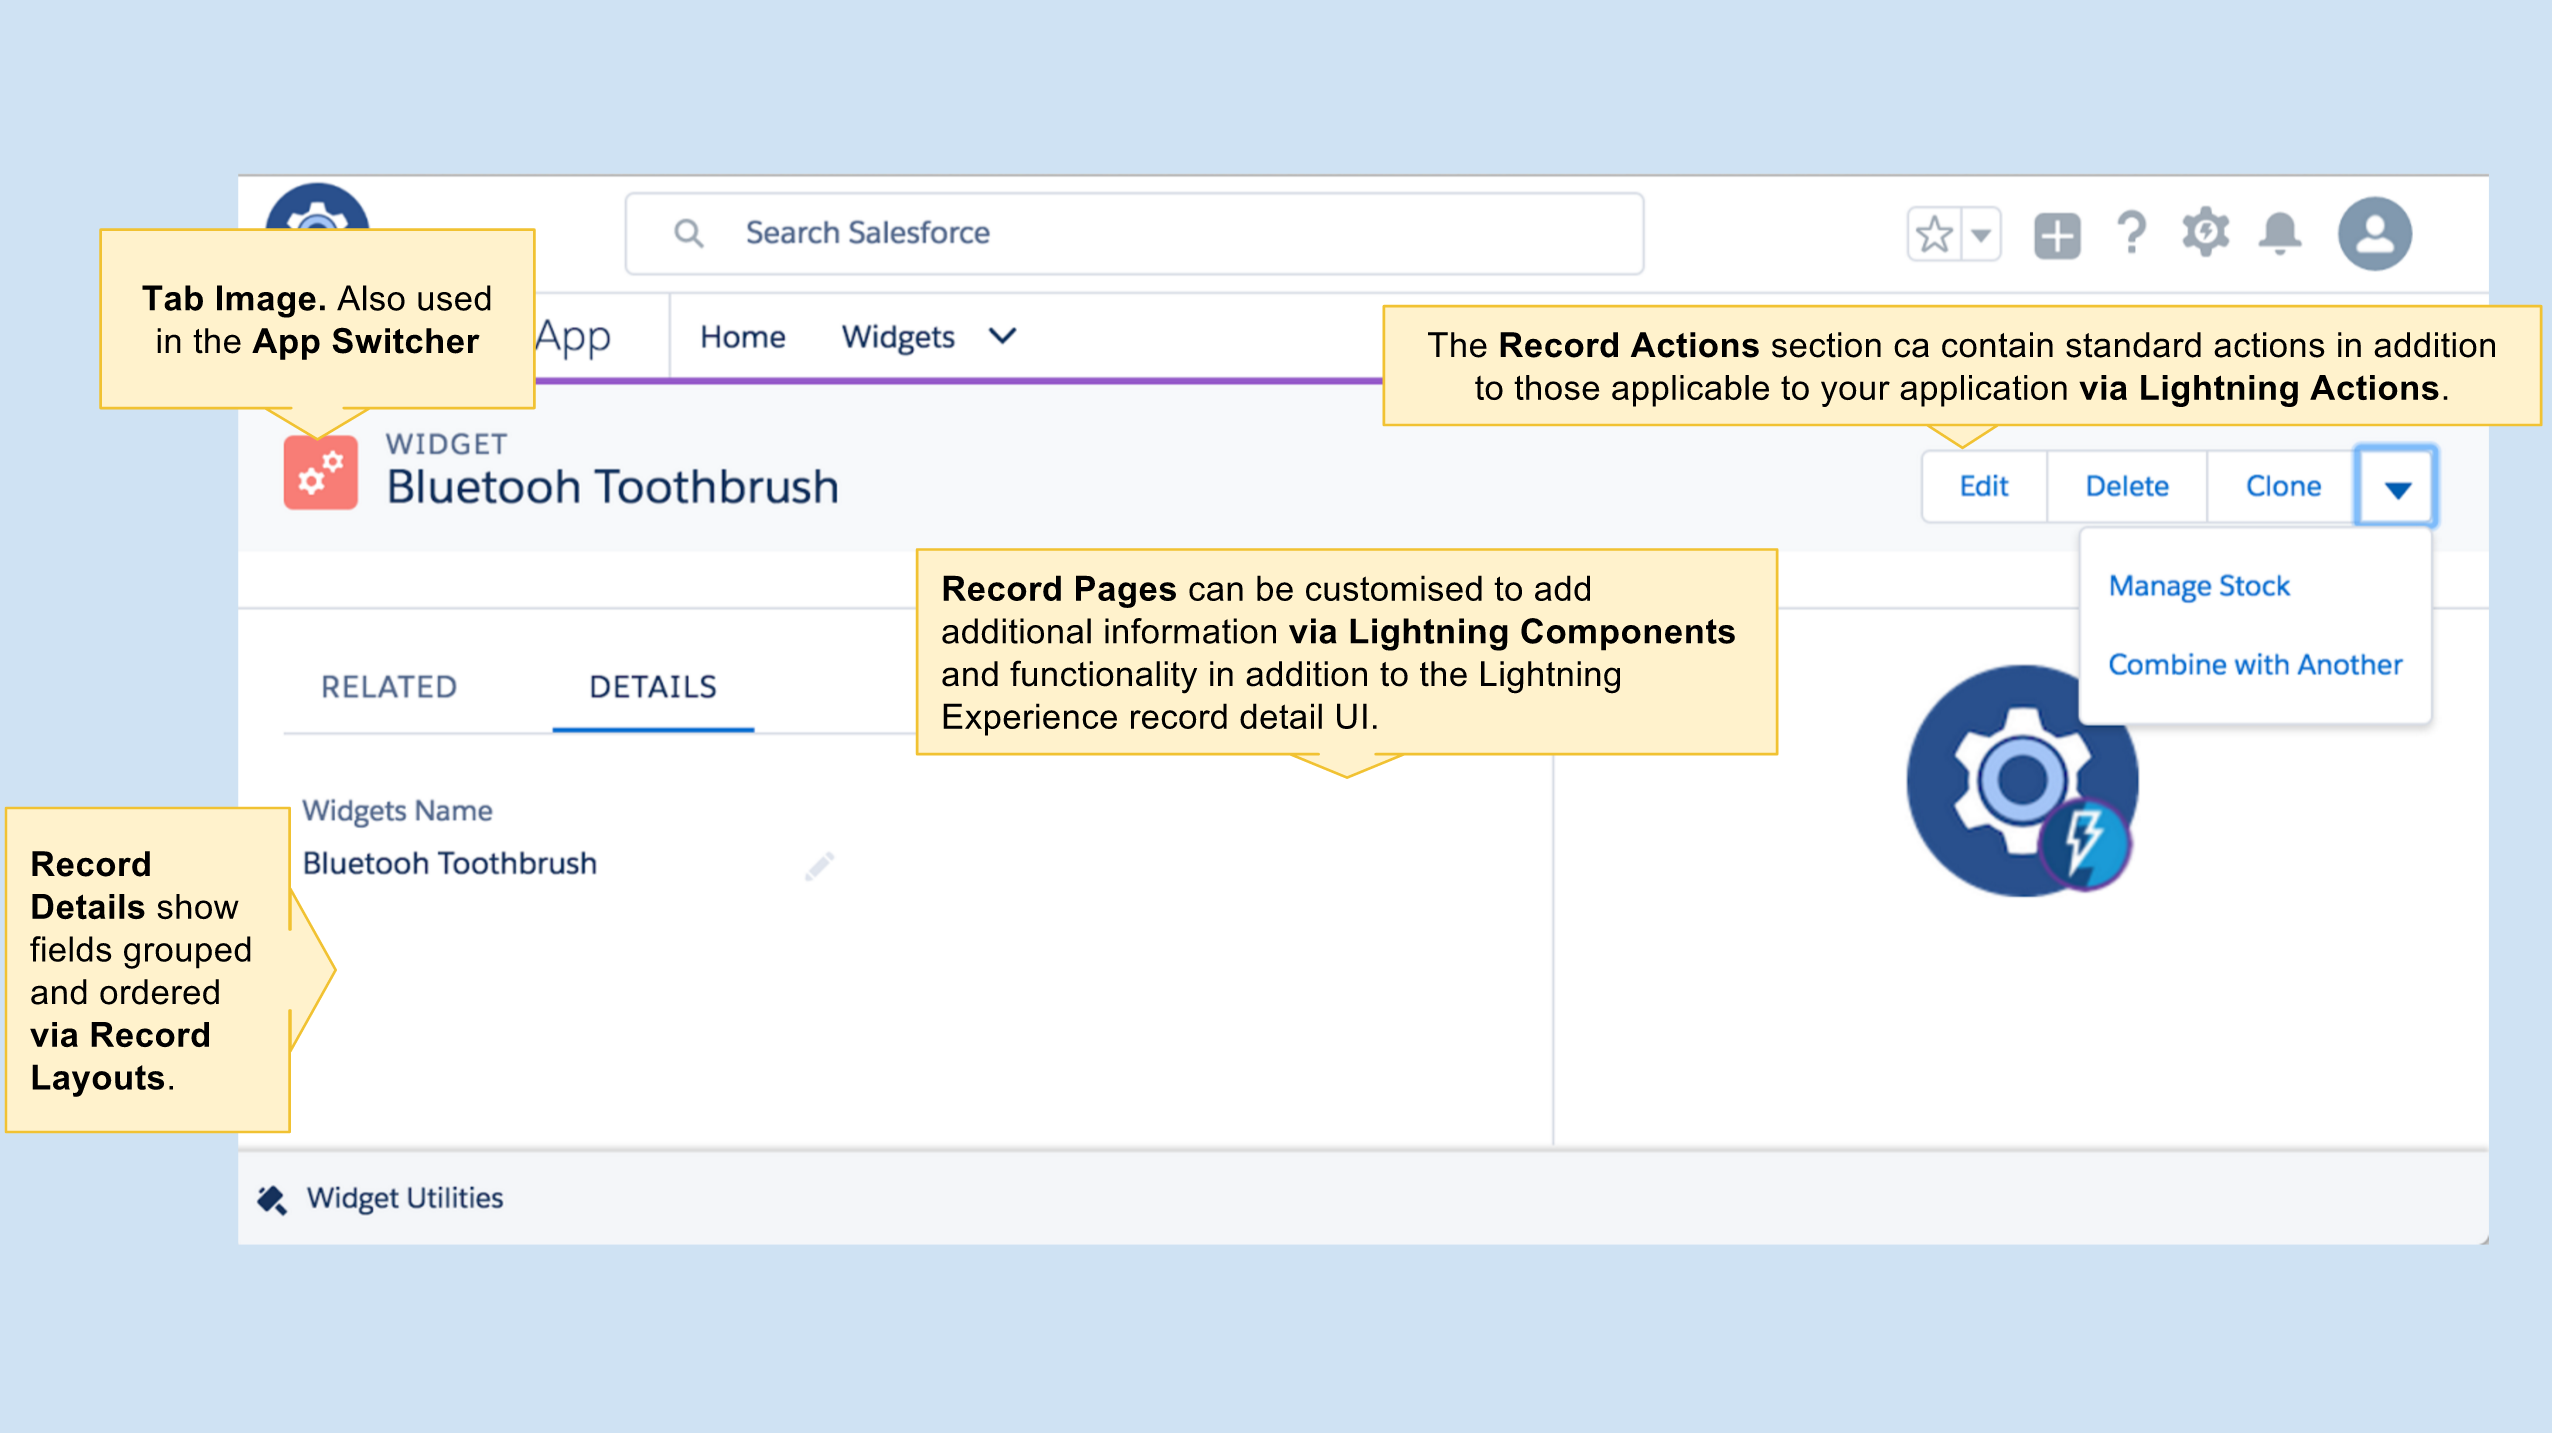
 When you see the cog image with the Lightning logo in it, it means that that space can be anything you imagine! Because that space is driven by a Lightning Component!
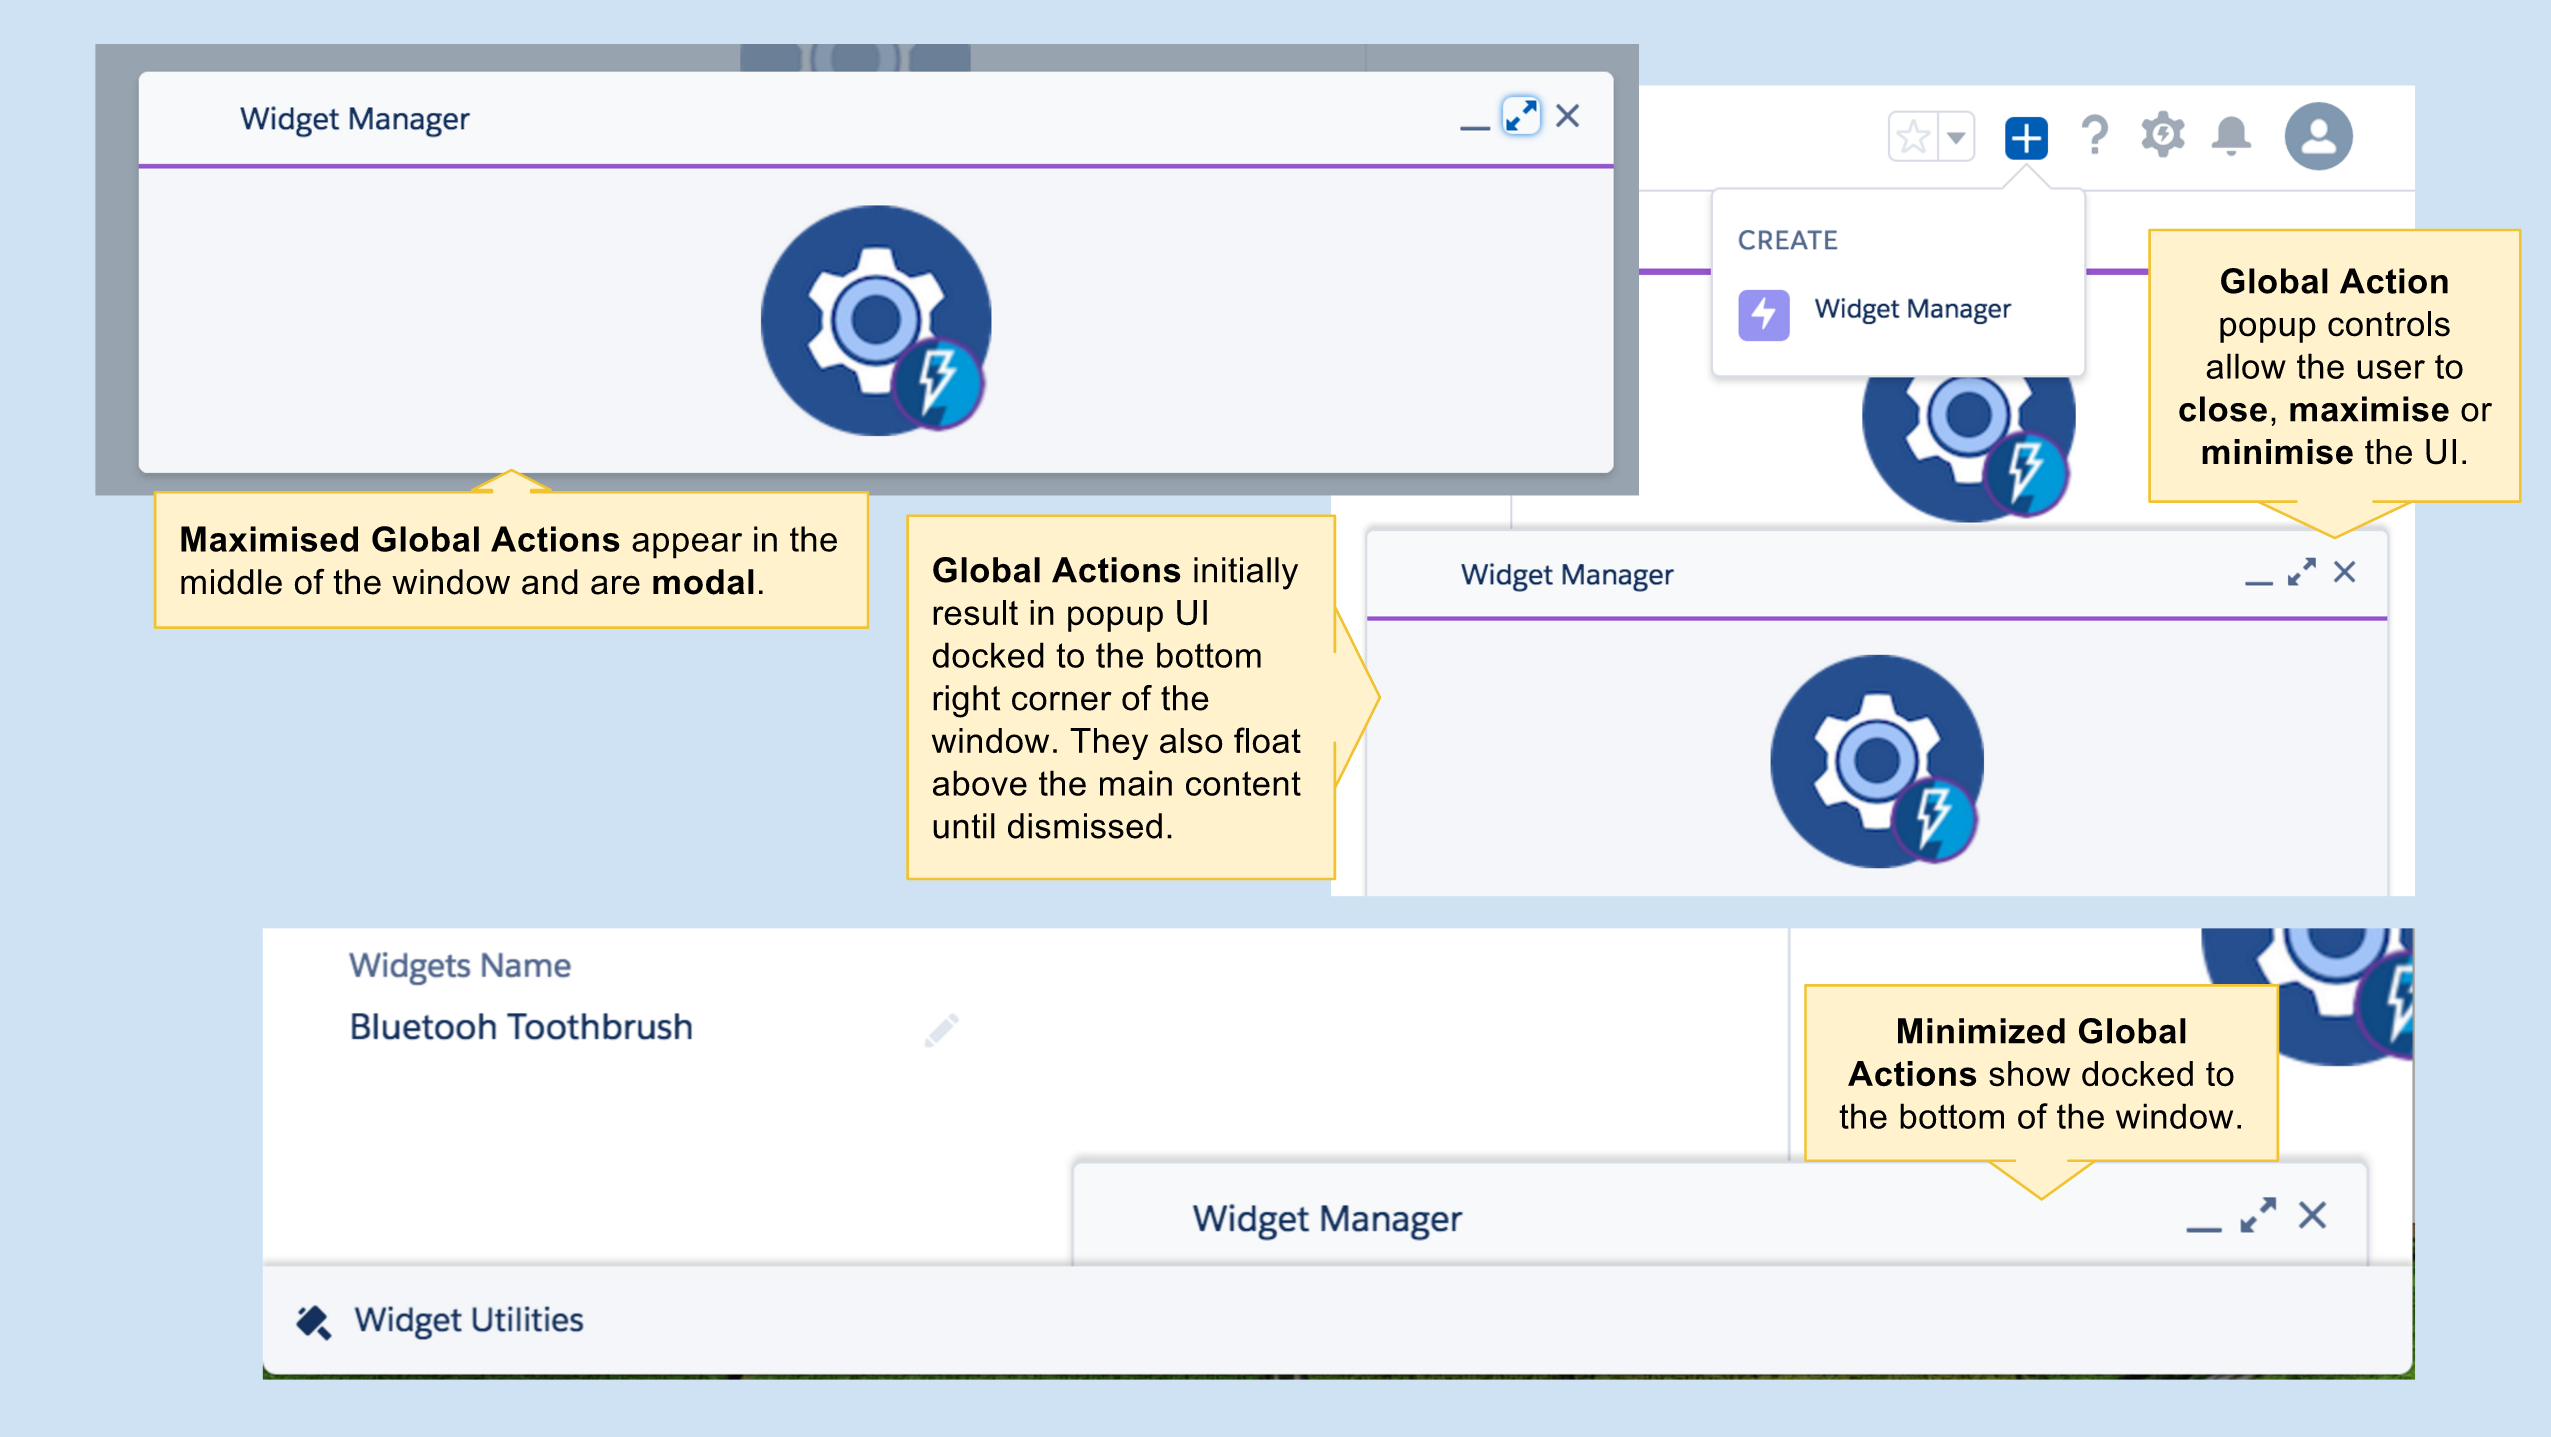


 If you cannot wait to go try out the utility bar at this point, click the Deploy to Salesforce button below and it will deploy a sample application (make sure to use a Winter’17 org). Once deployed go to the App Manager under Setup and assign the Utility Bar Demo application to your profile.

