
When developing within Salesforce, dependencies are formed in many ways, not just those made explicitly when writing code, but those formed by using declarative tools. Such as defining Actions and Layouts for example. This blog introduces a new open source library I have been working on called Force DI. The goal is to simplify and more importantly consolidate where and how to configure at runtime certain dependencies between Apex, Visualforce or Lightning component code.

Forming dependencies at runtime instead of explicitly during development can be very advantageous. So whether you are attempting to decompose a large org into multiple DX packages or building a highly configurable solution, hopefully, you will find this library useful!
So what does the DI bit stand for?
The DI bit in Force DI stands for Dependency Injection, which is a form of IoC (Inversion of Control). Both are well-established patterns for providing the runtime glue between two points, basically the bit in the middle. Let’s start with an Apex example. In order to use DI, you need to forgo the use of the “new” operator at the point where you want to do the injection. For example, consider the following code:-
PaymentEngine engine = new PayPal();
In the above example, you are explicitly expressing a dependency. Which not only means you have to deploy or package all your payment engines together, but you have hardcoded a finite set you support and thus also forgone extensibility. With Force DI you can instead write
PaymentEngine engine = (PaymentEngine) di_Injector.Org.getInstance(PaymentEngine.class);
How does it know which class to instantiate then?
Whats happening here is the Injector class is using binding configuration (also dynamically discovered) to find out which class to actually instantiate. This binding configuration can be admin controlled, packaged (e.g. “PayPal Package”) and/or defined dynamically via code. Setting up binding config via code enables dynamic binding by reading other configuration (e.g. the user’s payment preference) and binding accordingly.
The key goal of DI is that calling code is not concerning itself with how an instance is obtained, only what it does with it. The following shows how a declarative binding is expressed via the libraries Binding Custom Metadata Type:-

If this all seems a bit indirect, that’s the point! Because of this indirection, you can now choose to deploy/package other payment gateway implementations independently from each other as well as be sure that everywhere your other code needs a PaymentEngine the implementation is resolved consistently. For a more advanced OOP walkthrough see the code sample here.
Can this help me with other kinds of dependencies?
Yes! Let’s take an example of Lightning Component used as an Action Override. Typically you would create a Lightning Component and associate it directly with an action override. However, this means that the object metadata, action override and the Lightning code (as well as whatever is dependent on that) must travel around together. Rather than, for example, in separate DX packages. It also means that if you want to offer different variations of this action you would need to code all of that into the single component as well.
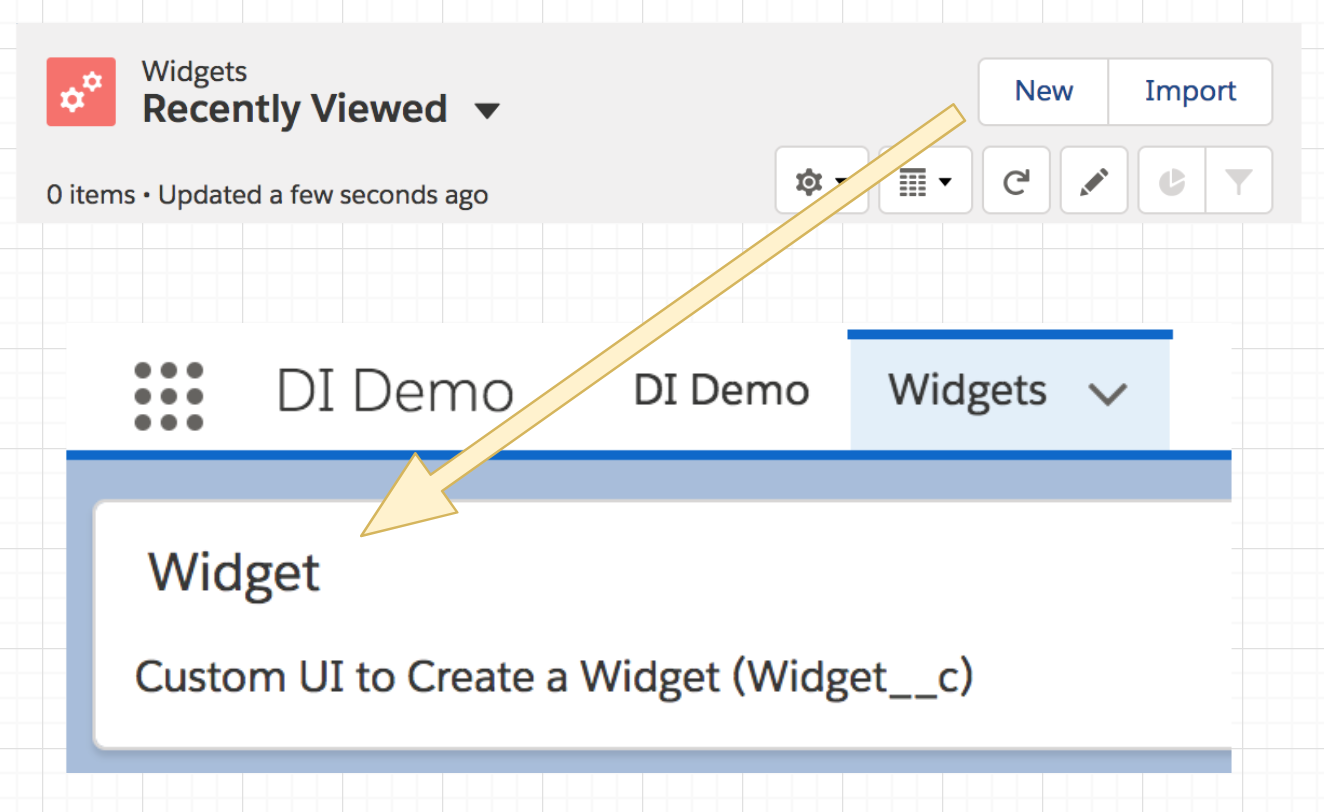
As before let’s review what the Lightning Component Action Override looks like without DI:-
<aura:component implements="lightning:actionOverride,force:hasSObjectName">
   <lightning:cardtitle="Widget">
     <p class="slds-p-horizontal_small">Custom UI to Create a Widget ({!v.sObjectName})</p>
   </lightning:card>
</aura:component>
This component (and all its dependencies) would be directly referenced in the Action Override below:-
Now let us take a look at this again but using the Lightning c:injector component in its place:-
<aura:component implements="lightning:actionOverride,force:hasSObjectName">
   <c:di_injector bindingName="lc_actionWidgetNew">
      <c:di_injectorAttribute name="sObjectName" value="{!v.sObjectName}"/>
   </c:di_injector>
</aura:component>
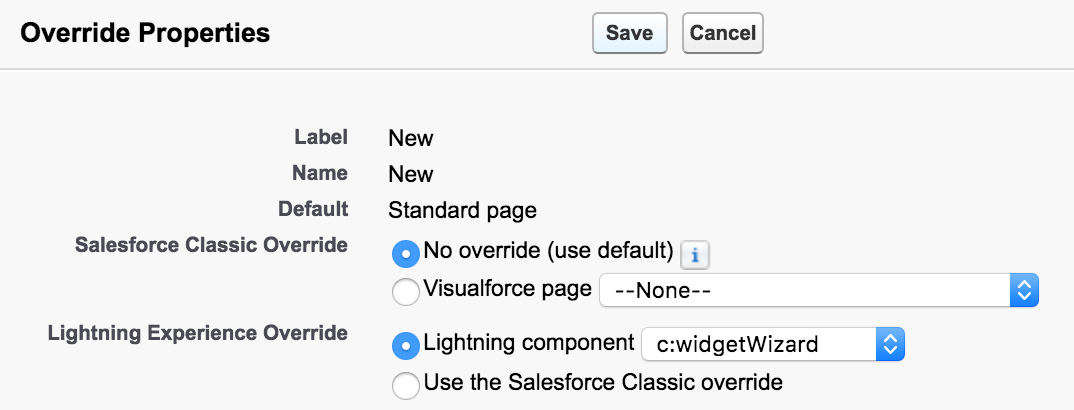
To make things clearer when reviewing Lightning Components in the org, the above component follows a generic naming convention, such as actionWidgetNew. This component is instead bound to the Action Override, not the above one and now looks like this:-

The binding configuration looks like this:-

Finally, the injected Lightning Component widgetWizard looks like this:-
<aura:component>
   <aura:attribute name="sObjectName"type="String"/>
   <lightning:card title="Widget">
     <p class="slds-p-horizontal_small">Custom UI to Create a Widget ({!v.sObjectName})</p>
   </lightning:card>
</aura:component>
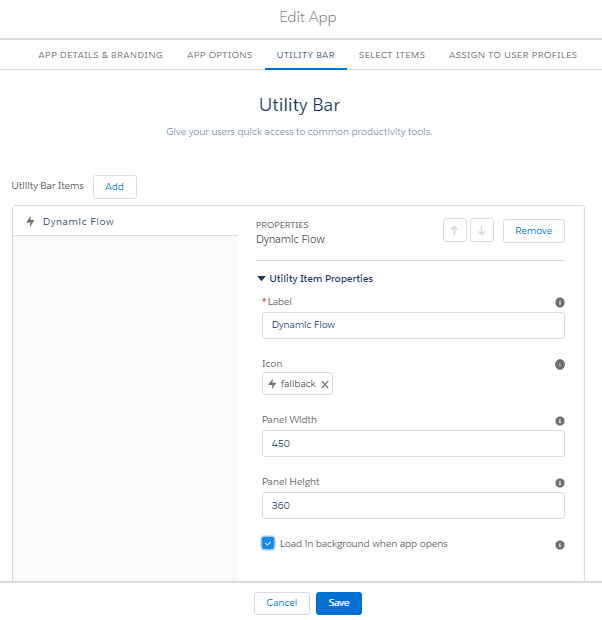
Note: You have the ability to pass context through to the bound Lightning Component just as the sObjectName attribute value was passed above. The c:injector component can be used in many other places such as Quick Actions, Lightning App Builder Pages, and Utility Bar. Check out this example page in the repo for another example.
What about my Visualforce page content can I inject that?

Visualforce used by Actions and in Layouts can be injected in much the same way as above, with a VF page acting as the injector proxy using the Visualforce c:injector component. We will skip showing what things looked like before DI, as things follow much the same general pattern as the Lightning Component approach.
The following example shows the layoutWidgetInfo page, which is again somewhat generically named to indicate its an injector proxy and not a real page. It is this page that is referenced in the Widget objects Layout:-
<apex:page standardController="Widget__c" extensions="di_InjectorController">
   <c:di_injector bindingName="vf_layoutWidgetInfo" parameters="{!standardController}"/>
</apex:page>
public class ForceApp3Module extends di_Module {

    public override void configure() {

        // Example named binding to a Visualforce component (via Provider)
        bind('vf_layoutWidgetInfo').visualforceComponent().to(WidgetInfoController.Provider.class);

        // Example SObject binding (can be used by trigger frameworks, see force-di-demo-trigger)
        bind(Account.getSObjectType()).apex().sequence(20).to(CheckBalanceAccountTrigger.class);

        // Example named binding to a Lightning component
        bind('lc_actionWidgetManage').lightningComponent().to('c:widgetManager');
    }
}
NOTE: The above binding configuration module class is itself injected into the org-wide Injector by a corresponding custom metadata Binding record here. You can also see in the above example other bindings being configured, see below for more on this.
The actual implementation of the injected Visualforce Component widgetInfo looks like this:-
<apex:component controller="WidgetInfoController">
  <apex:attribute name="standardController"
     type="ApexPages.StandardController"
     assignTo="{!StandardControllerValue}" description=""/>
  <h1>Success I have been injected! {!standardController.Id}</h1>
</apex:component>
Decomposition Examples
The examples, shown above and others are contained in the sample repo. Each of the root package directories, force-app-1, force-app-2, and force-app-3 helps illustrate how the point of injection vs the runtime binding can be split across the boundaries of a DX package, thus aiding decomposition. The force-di-trigger-demo (not shown below) also contains a sample trigger handler framework using the libraries ability to resolve multiple bindings (to trigger handlers) in a given sequence, thus supporting the best practice of a single trigger per object.

Further Background and Features
I must confess when I started to research Java Dependency Injection (mainly via Java Guice) I was skeptical as to how much I could get done without custom annotation and reflection support in Apex. However, I am pretty pleased with the result and how it has woven in with features like Custom Metadata Types and how the Visualforce and Lightning Component injectors have turned out. A plan to write future Wiki pages on the associated GitHub repo to share more details on the Force DI API. Meanwhile here is a rundown of some of the more advanced features.
- Provider Support
Injectors by default only return one instance of the bound object, hence getInstance. Bindings that point to a class implementing the Provider interface (see inner interface) can override this. Which also allows for the construction of classes that do not have default constructors or types not supported by Type.forName. This feature also works in conjunction with the ability to pass a parameter via the Apex Injector, e.g. Injector.Org.getInstance(PaymentEngine.cls, someData); - Parameters
Each of the three Injectors permits the passing of parameter/context information into the bound class or component. The examples above illustrate this. - Modules, Programmatic Binding Configuration and Injector Scopes
Binding Modules group programmatic bindings and allow you to hook programmatically into the initialization of the Injector. Modules use the Fluent style interface to express bindings very clearly. The force-app-3 package in the repo uses this approach to define the bindings shown in the VF example above. You can also take a look at a worked example here of how local (one-off) Injectors can be used and here for a more complex OO example of conditional bindings works. - StandardController Passthrough
For Visualforce Component injections the frameworks parameter passing capabilities supports passing through the instance of the StandardController from the hosting page into the injected component, as can be seen in the example above. - Binding Discovery by SObject vs Name
The examples above utilize single bindings by a unique name. However, it is becoming quite common to adapt trigger frameworks to support DI and thus allow a single trigger to dynamically reach out to one or more handlers (perhaps installed in separate DX packages). This example shows how Force DI could be used in such a scenario.
Conclusion
This blog has hopefully wet your appetite to learn more! If so, head over to the repo and have a look through the samples in this blog and others. My next step is to wrap this up in a DX package to make it easier to get your hands on it, for now, download the repo and deploy via DX. I am also keen to explore what other aspects of Java Guice might make sense, such as the Linked Bindings feature.
Meanwhile, I would love feedback on the sample code and library thus far. Last but not least I would like to give a shout out to John Daniel and Doug Ayers for their great feedback during the initial development of the library and this blog. Enjoy!

 In this blog, I want to highlight a couple of great UI features provided by the


 Your customers may not want every user to have the ability to activate and deactivate features as shown above. The sample application associated with this blog includes a Manage Features
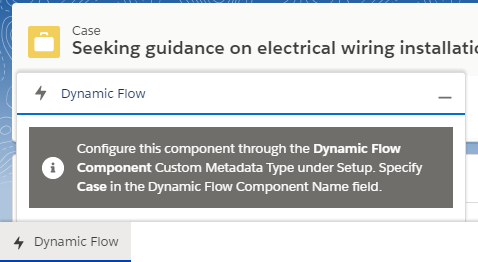
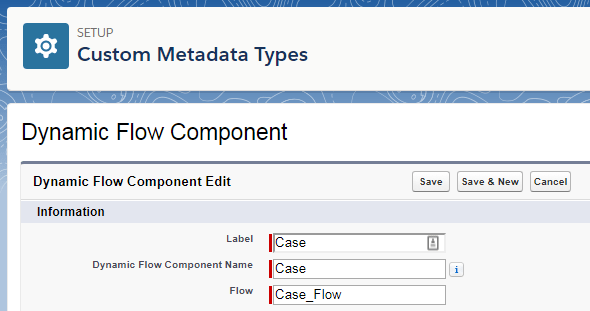
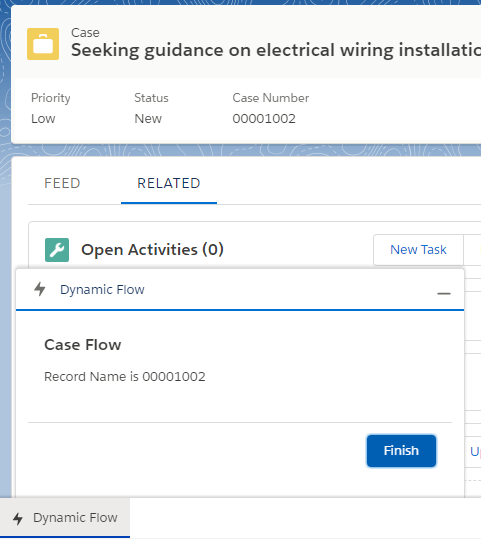
 The Dynamic Flow Component (DFC) allows you to further extend your use of auto launch and screen


 Its been nearly 9 years since i created my first Salesforce developer account. Back then I was leading a group of architects building on premise enterprise applications with Java J2EE and Microsoft .Net. It was fair to say my decision to refocus my career not only in building the
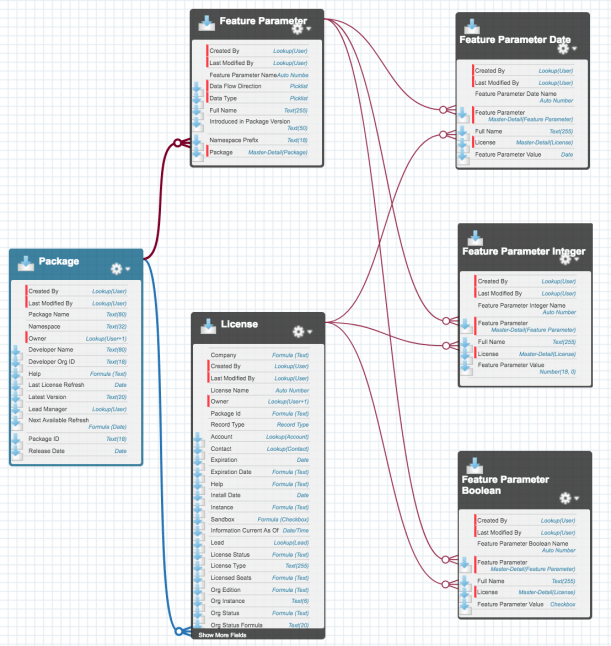
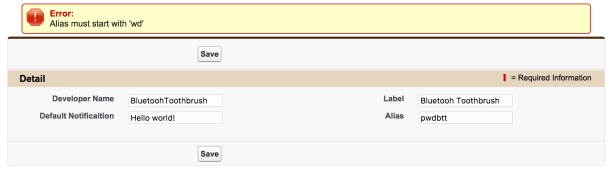
  When you have more complex custom metadata needs or multiple custom metadata types, the UI requirements for users to manage records may also need to be more sophisticated. For example if you wish to build a setup wizard or type of visual editor. Much like you see with the Flow or Process Builder tools. So if you find you want to build your own UI for custom metadata records what is involved?
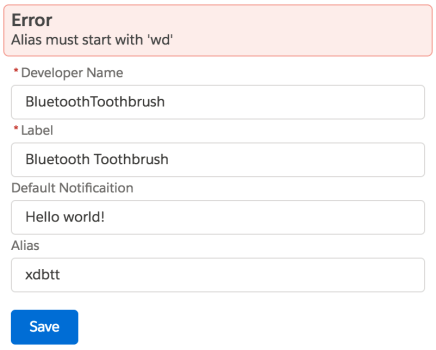


 This was my first TrailheaDX and what an event it was! With my Field Guide in hand i set out into the wilderness! In this blog i’ll share some of my highlights, thoughts and links to the latest resources. Many of the newly announced things you can actually get your hands on